Backing Up LME Logs
Logging Made Easy (LME) uses built-in Elastic features to back up logs. By default, Elasticsearch supports backing up to filesystems. This is the only supported method in LME. While other backup destinations exist, they require plugins that are not currently supported by LME.
How Backups Work
Backups are created using Elasticsearch snapshots.
The initial snapshot will includes all of the current logs.
Future snapshots only include changes since the last backup.
This allows you to take regular backups without a major impact on the system’s performance or storage.
Setting Up a Backup Schedule
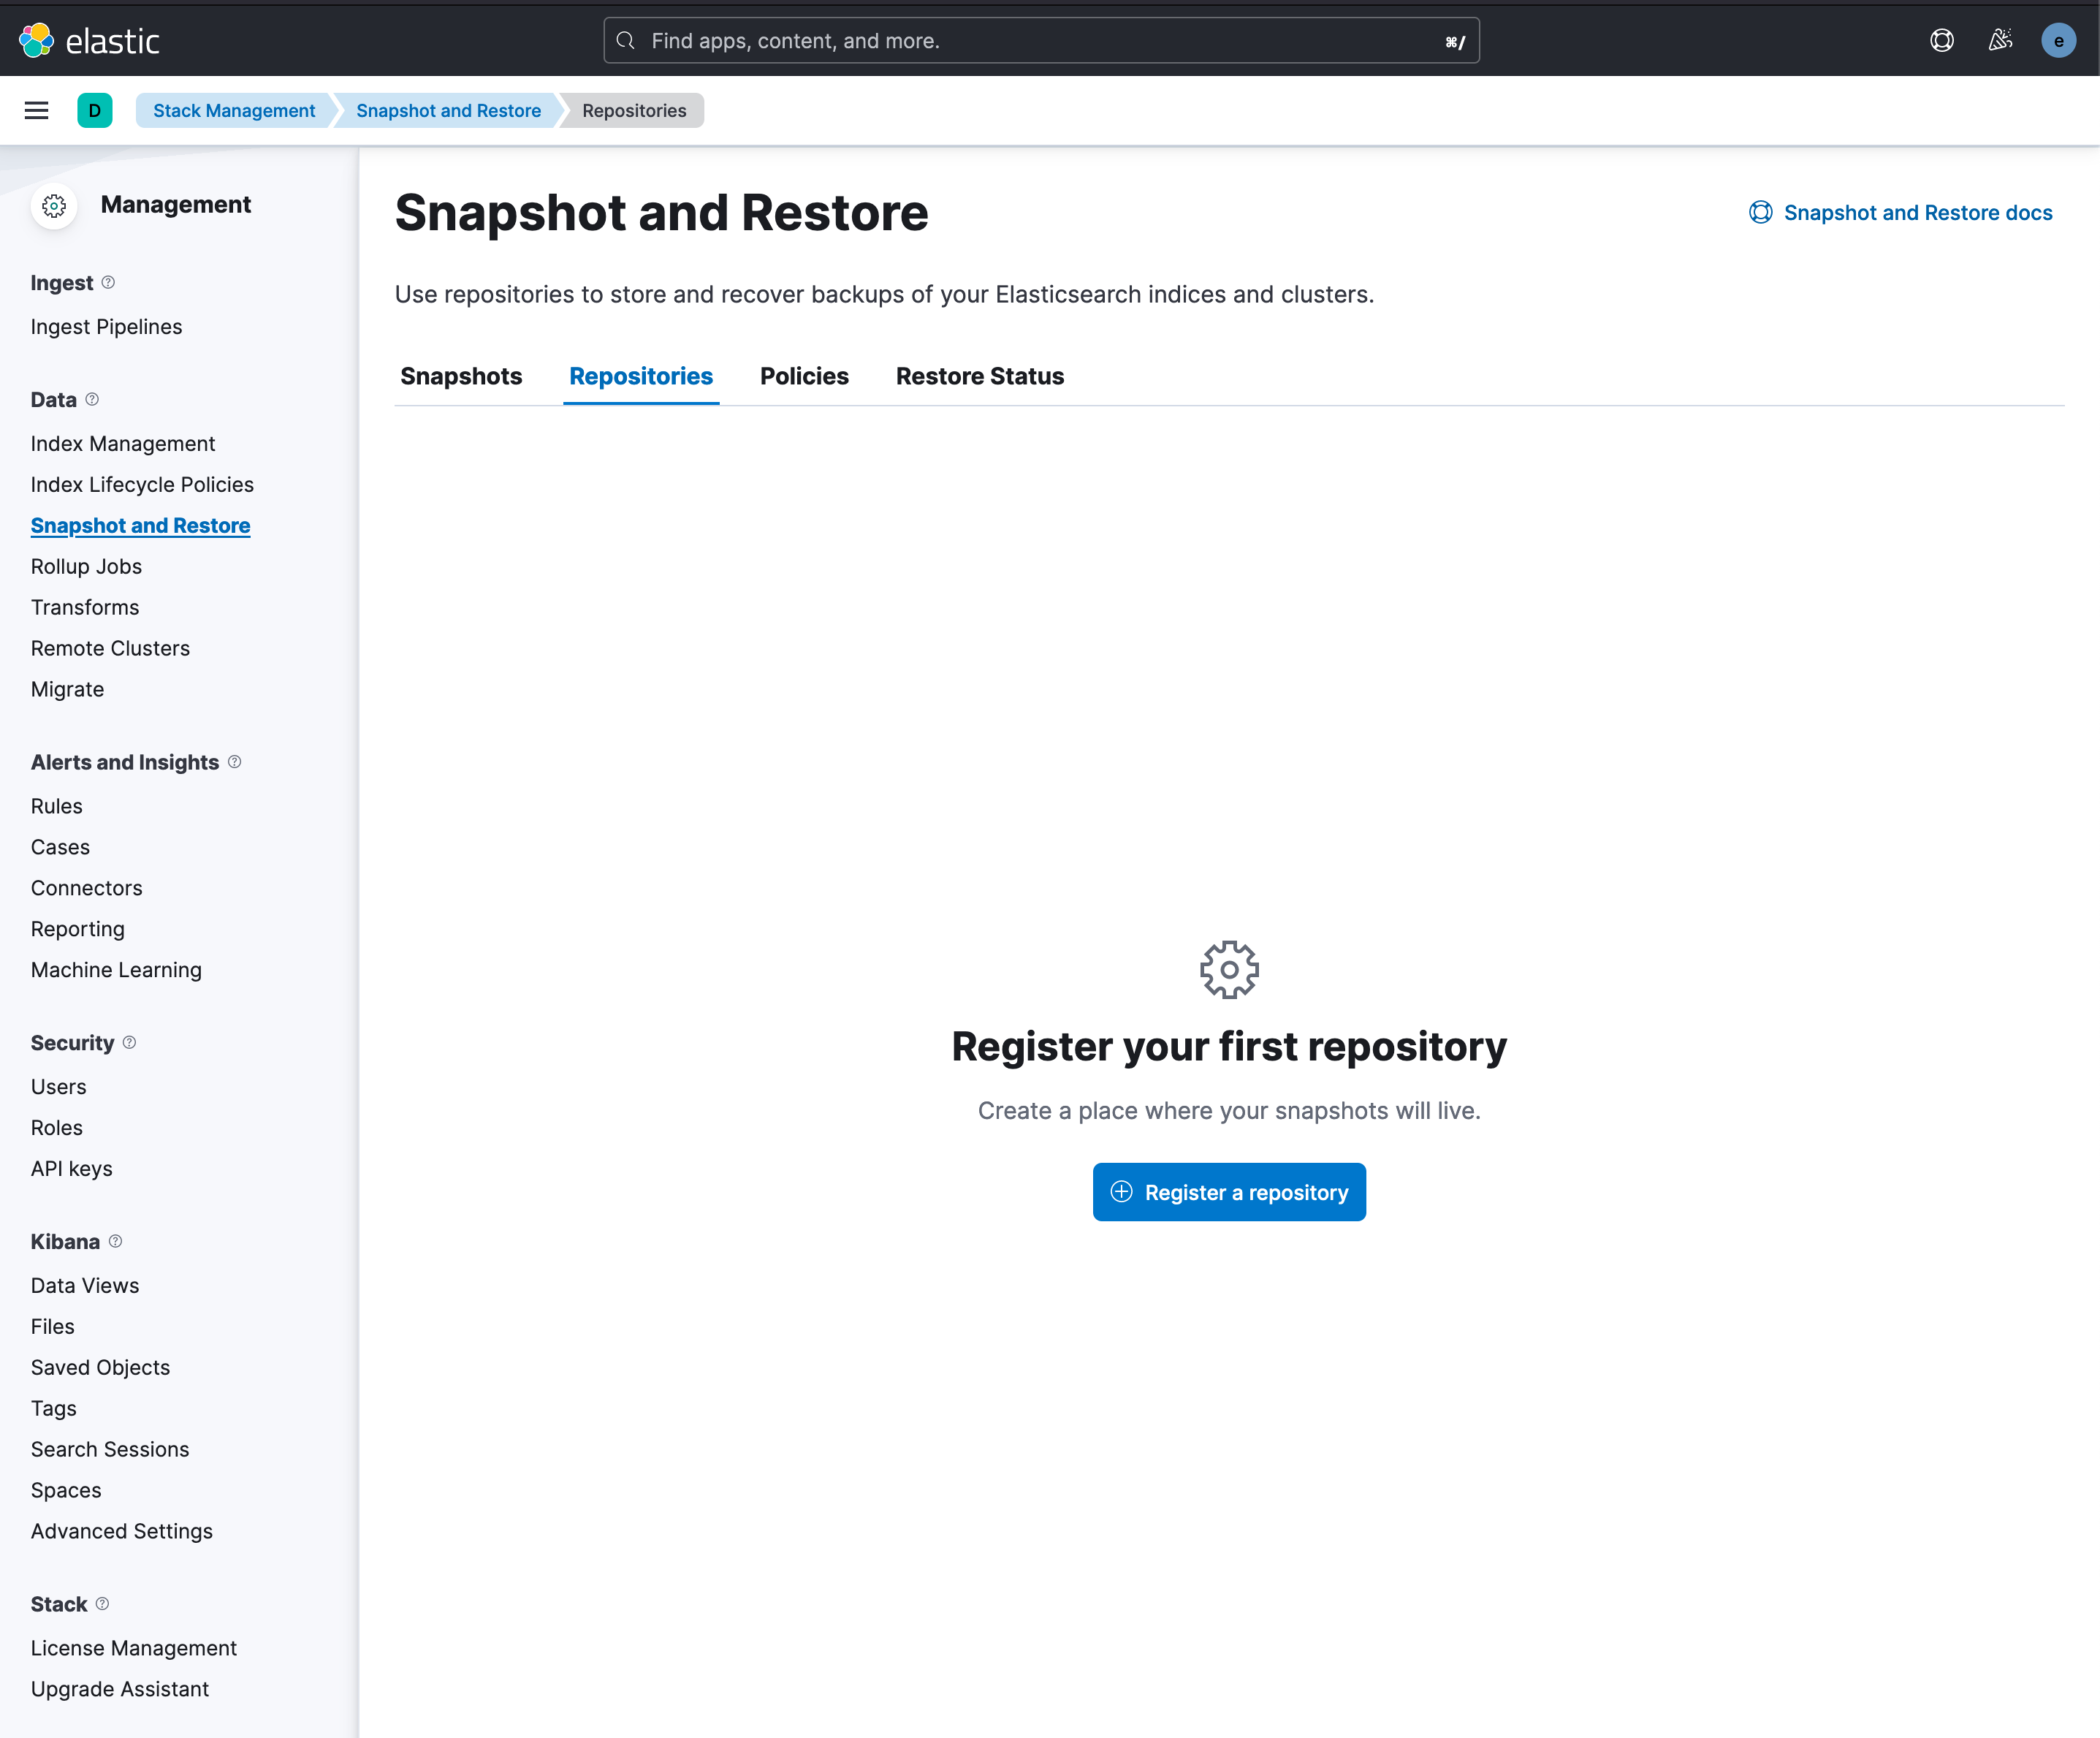
Step 1: Create a Filesystem Repository
LME sets up a Podman volume called lme_backups, so backups can be stored outside of the container.
Note: If managing backup storage becomes a concern, the LME Team plans to release future documentation for advanced options.
Follow these steps to create a repository in Kibana:
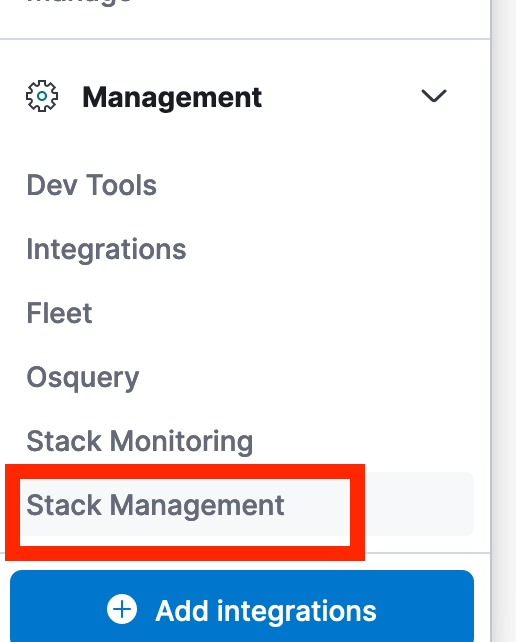
- Navigate to: Stack Management -> Snapshot and Restore.
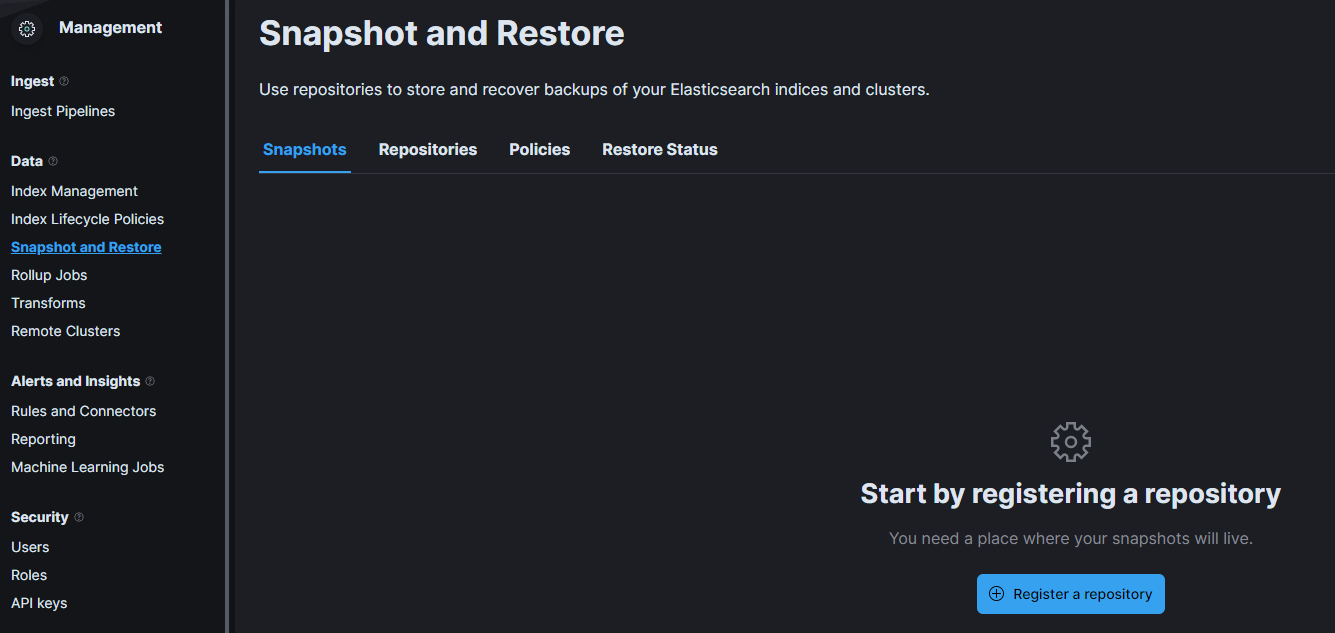
- Click on the Register a repository button.

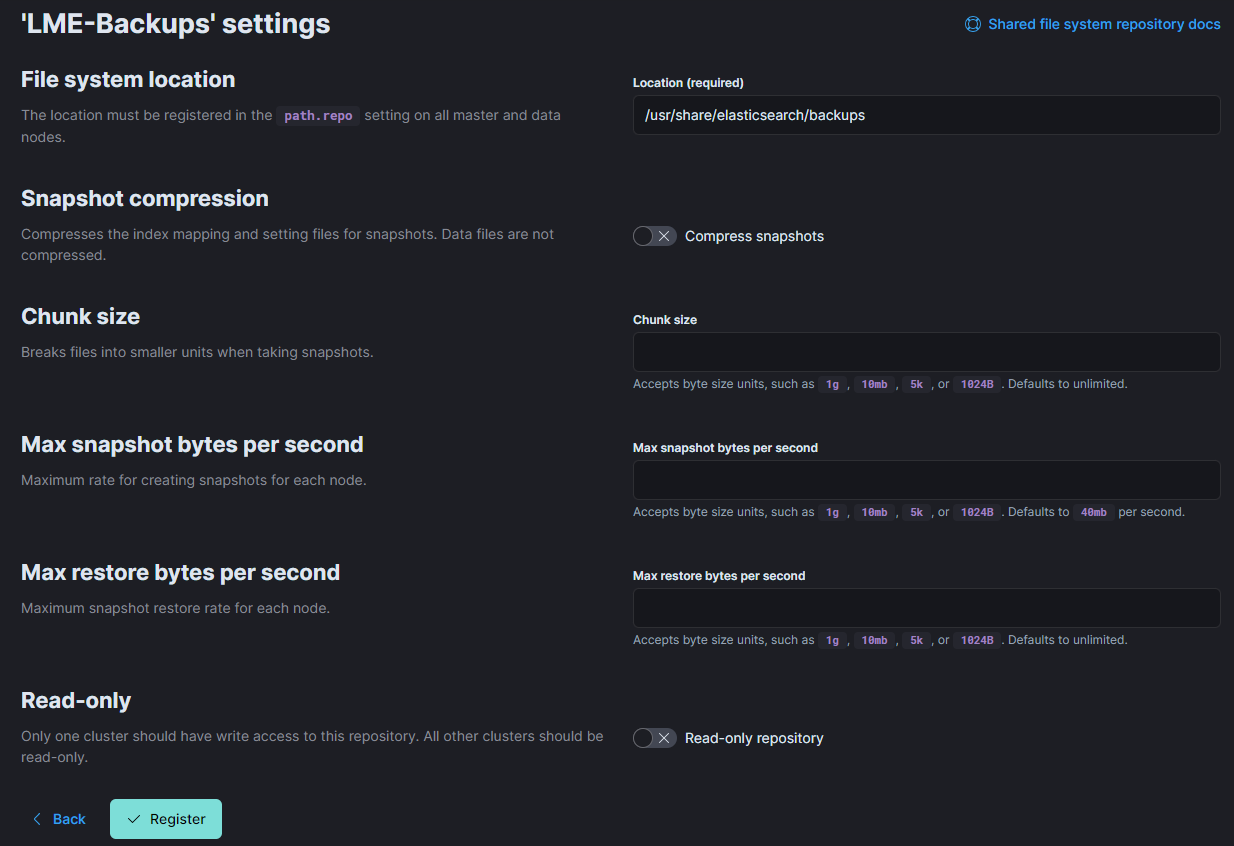
Fill out the repository details as shown:
Name: LME-backups (or another name of your choice)
Repository Type: Shared file system
File system location:
/usr/share/elasticsearch/backupsThe other fields can be left with the default values or modified as required.
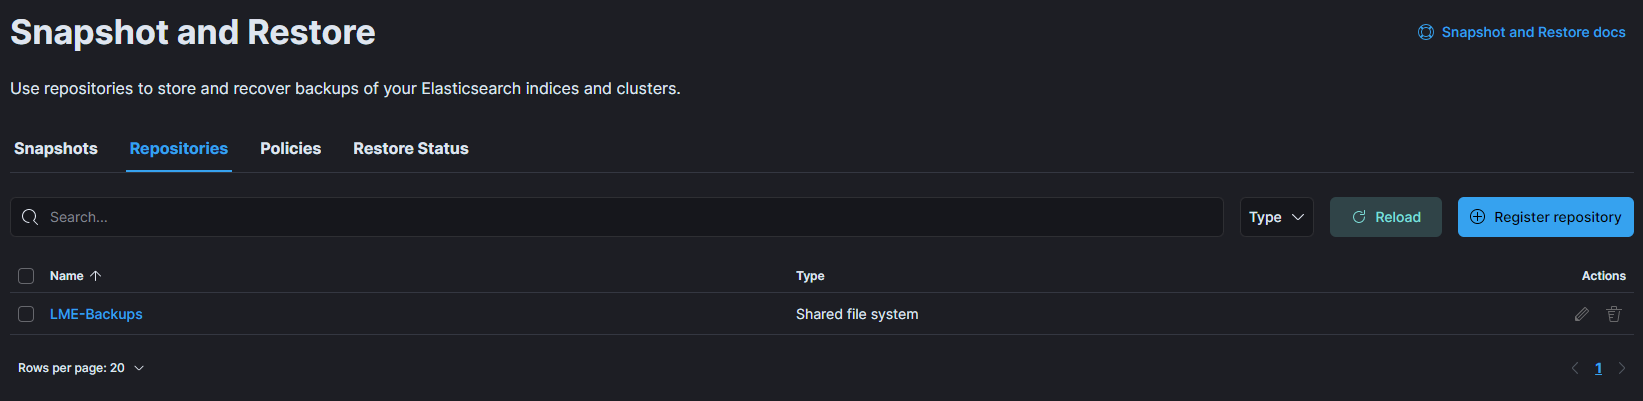
- The repository will be created and will show in the list on the Stack Management screen.
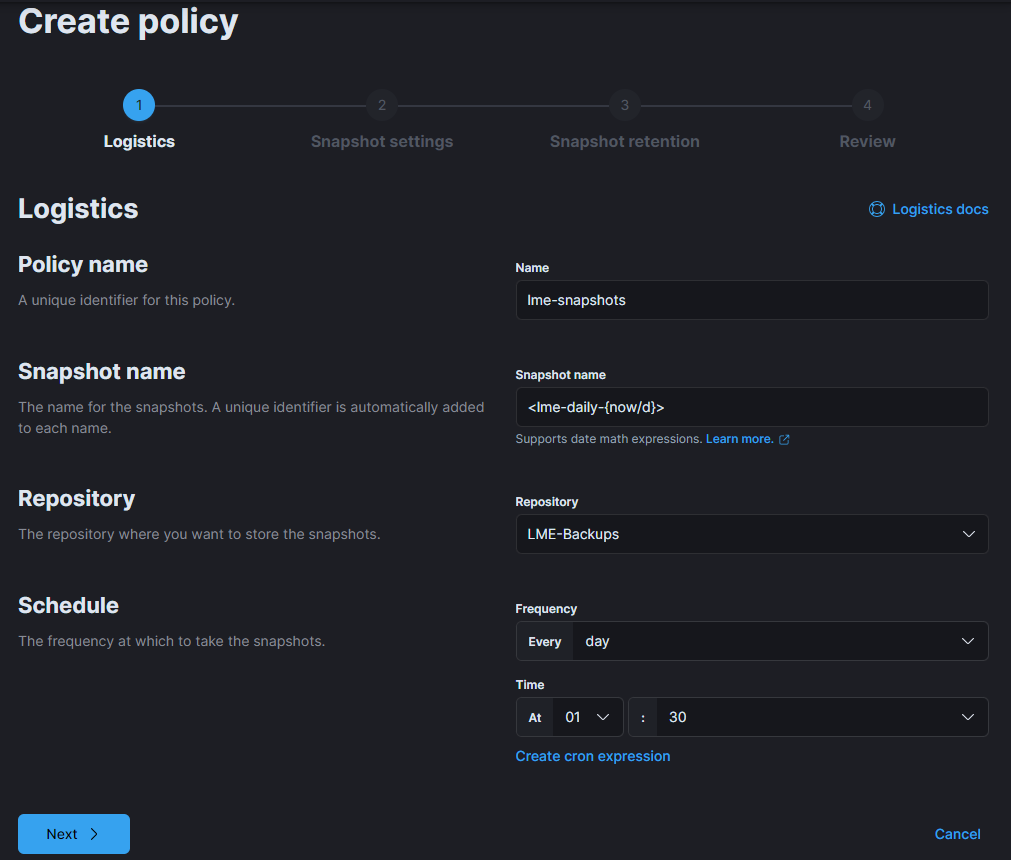
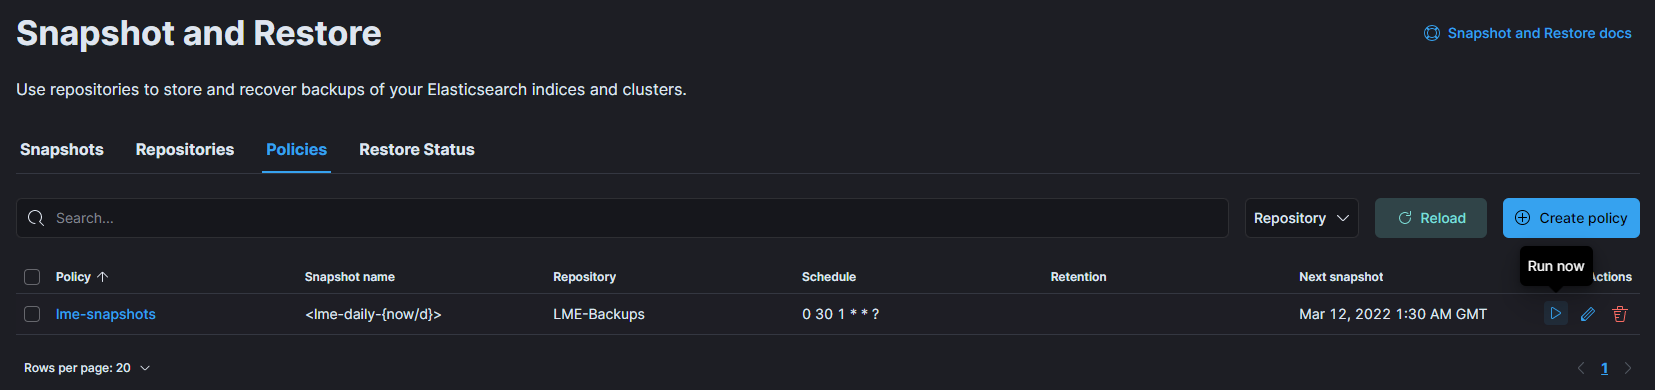
Step 2: Create a Snapshot Schedule Policy
To automate backups, follow these steps to create a recurring snapshot policy in Kibana.
Navigate to Stack Management -> Snapshot and Restore.
Click on the Policies tab.
Click on the Create a policy button.

Type a name for the new policy (e.g., “lme-snapshots”).
Snapshot name:
<lme-daily-{now/d}>This creates snapshot files prefixed with
lme-daily-followed by the current date.Ensure your new repository is selected, and then configure a schedule in line with your backup policy.
Note: Elasticsearch uses incremental snapshots, meaning only changes since the last snapshot are saved. This keeps storage usage low and minimizes performance impact.
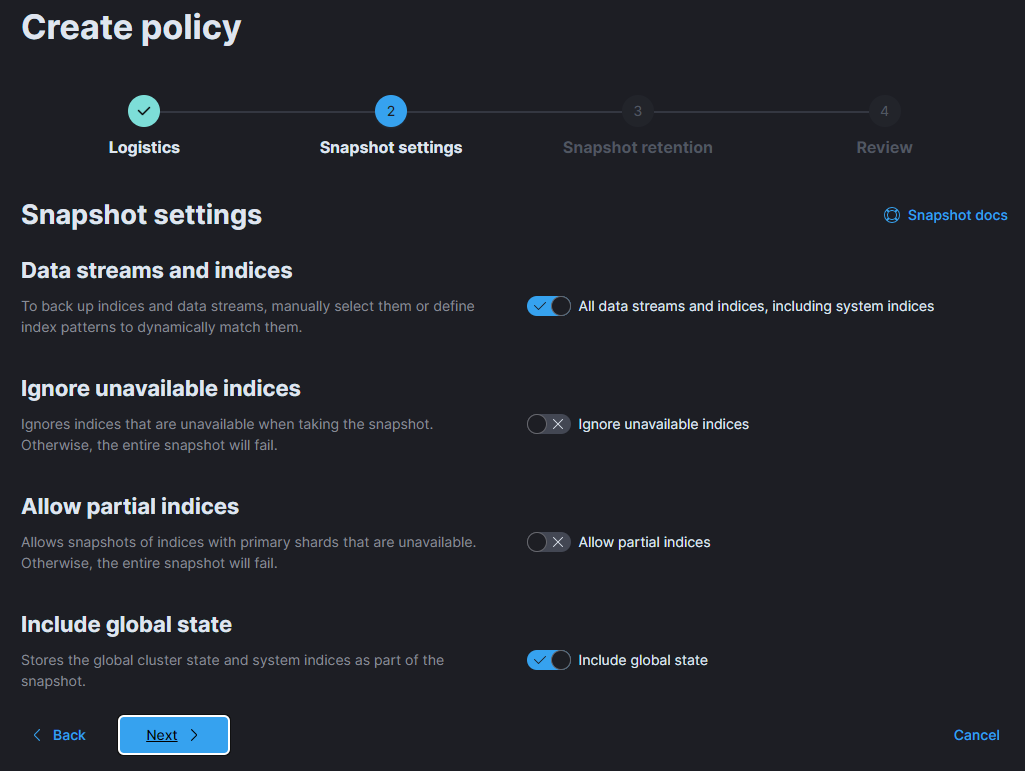
On the next screen, leave default values or configure retention settings based on available disk space.
Click on the Next button.
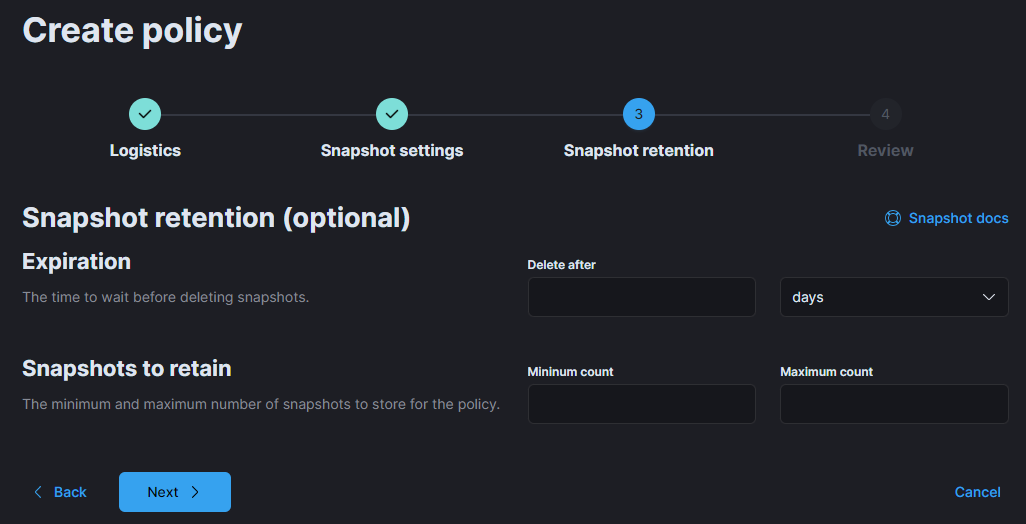
If desired, on the next screen, configure relevant retention settings based on your available disk space and your backup policy.
Click on the Next button.
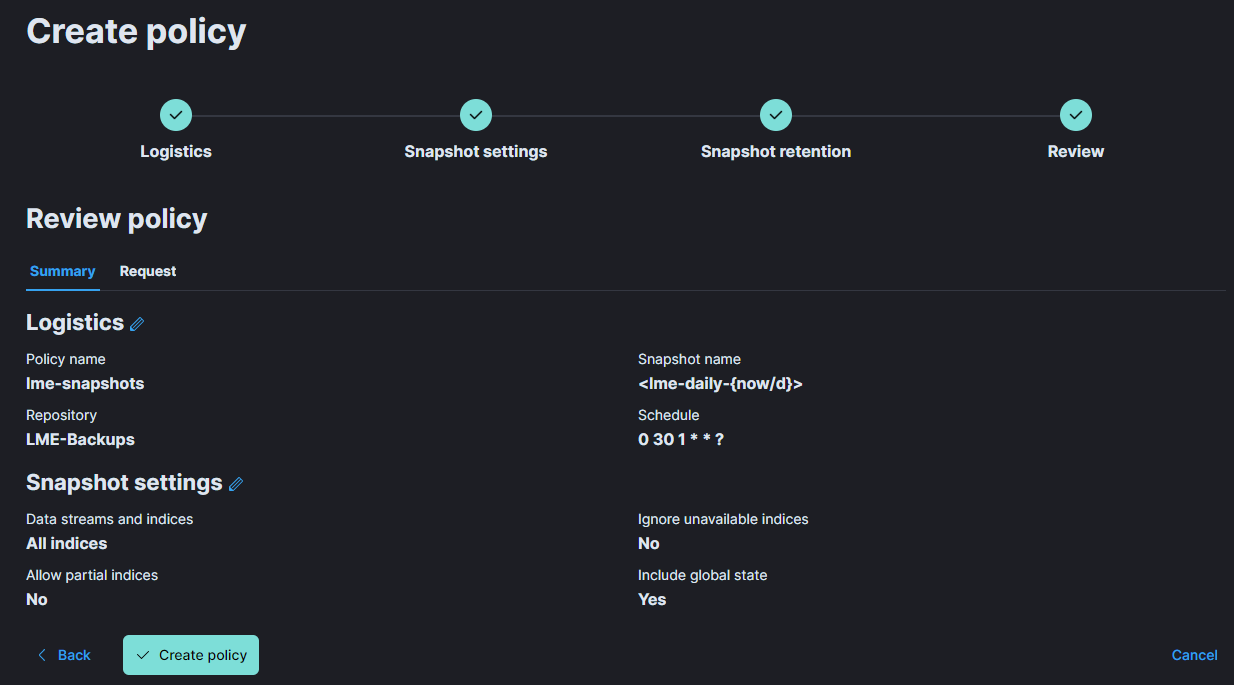
Review your configuration on the summary screen.
Click on the Create policy button to save and activate it.
To test the new policy or to create the initial snapshot, navigate to the Policies tab.
Click on the Run now option next to your new policy to trigger the first snapshot.
Backup Management
Once your snapshot policy is active, snapshots will be automatically saved to the lme_backups volume.
To view the backup files, run:
sudo -i
podman volume mount lme_backups
cd /var/lib/containers/storage/volumes/lme_backups/_data
ls
You should see a directory structure similar to below:
root@ubuntu:/var/lib/containers/storage/volumes/lme_backups/_data# ls
index-0  index.latest  indices  meta-cuPUnpl1S0Sx8IkPIWLoEA.dat  snap-cuPUnpl1S0Sx8IkPIWLoEA.dat
You can now copy, move, or archive the files as needed for your backup strategy.
Be sure to unmount the backup volume once you’re done managing the files by running:
podman volume unmount lme_backups
Note: Manage your snapshots according to your organization’s backup retention policies and storage practices. Regularly verify that snapshots are being created and stored successfully.
Restoring a Backup
If you have a new Elasticsearch instance and need to restore logs from previous LME deployment, follow the steps below.
Step 1. Open the Snapshot and Restore Menu
- Navigate to Stack-Management -> Snapshot and Restore -> Repositories
Step 2. Register the Repository
Click on the Register a repository button and enter the same details as wehen it was originally created.
Use the same container mount path (/usr/share/elasticsearch/backups) and then select Shared file system as the type.
Reference Create a Filesystem Repository for more information.
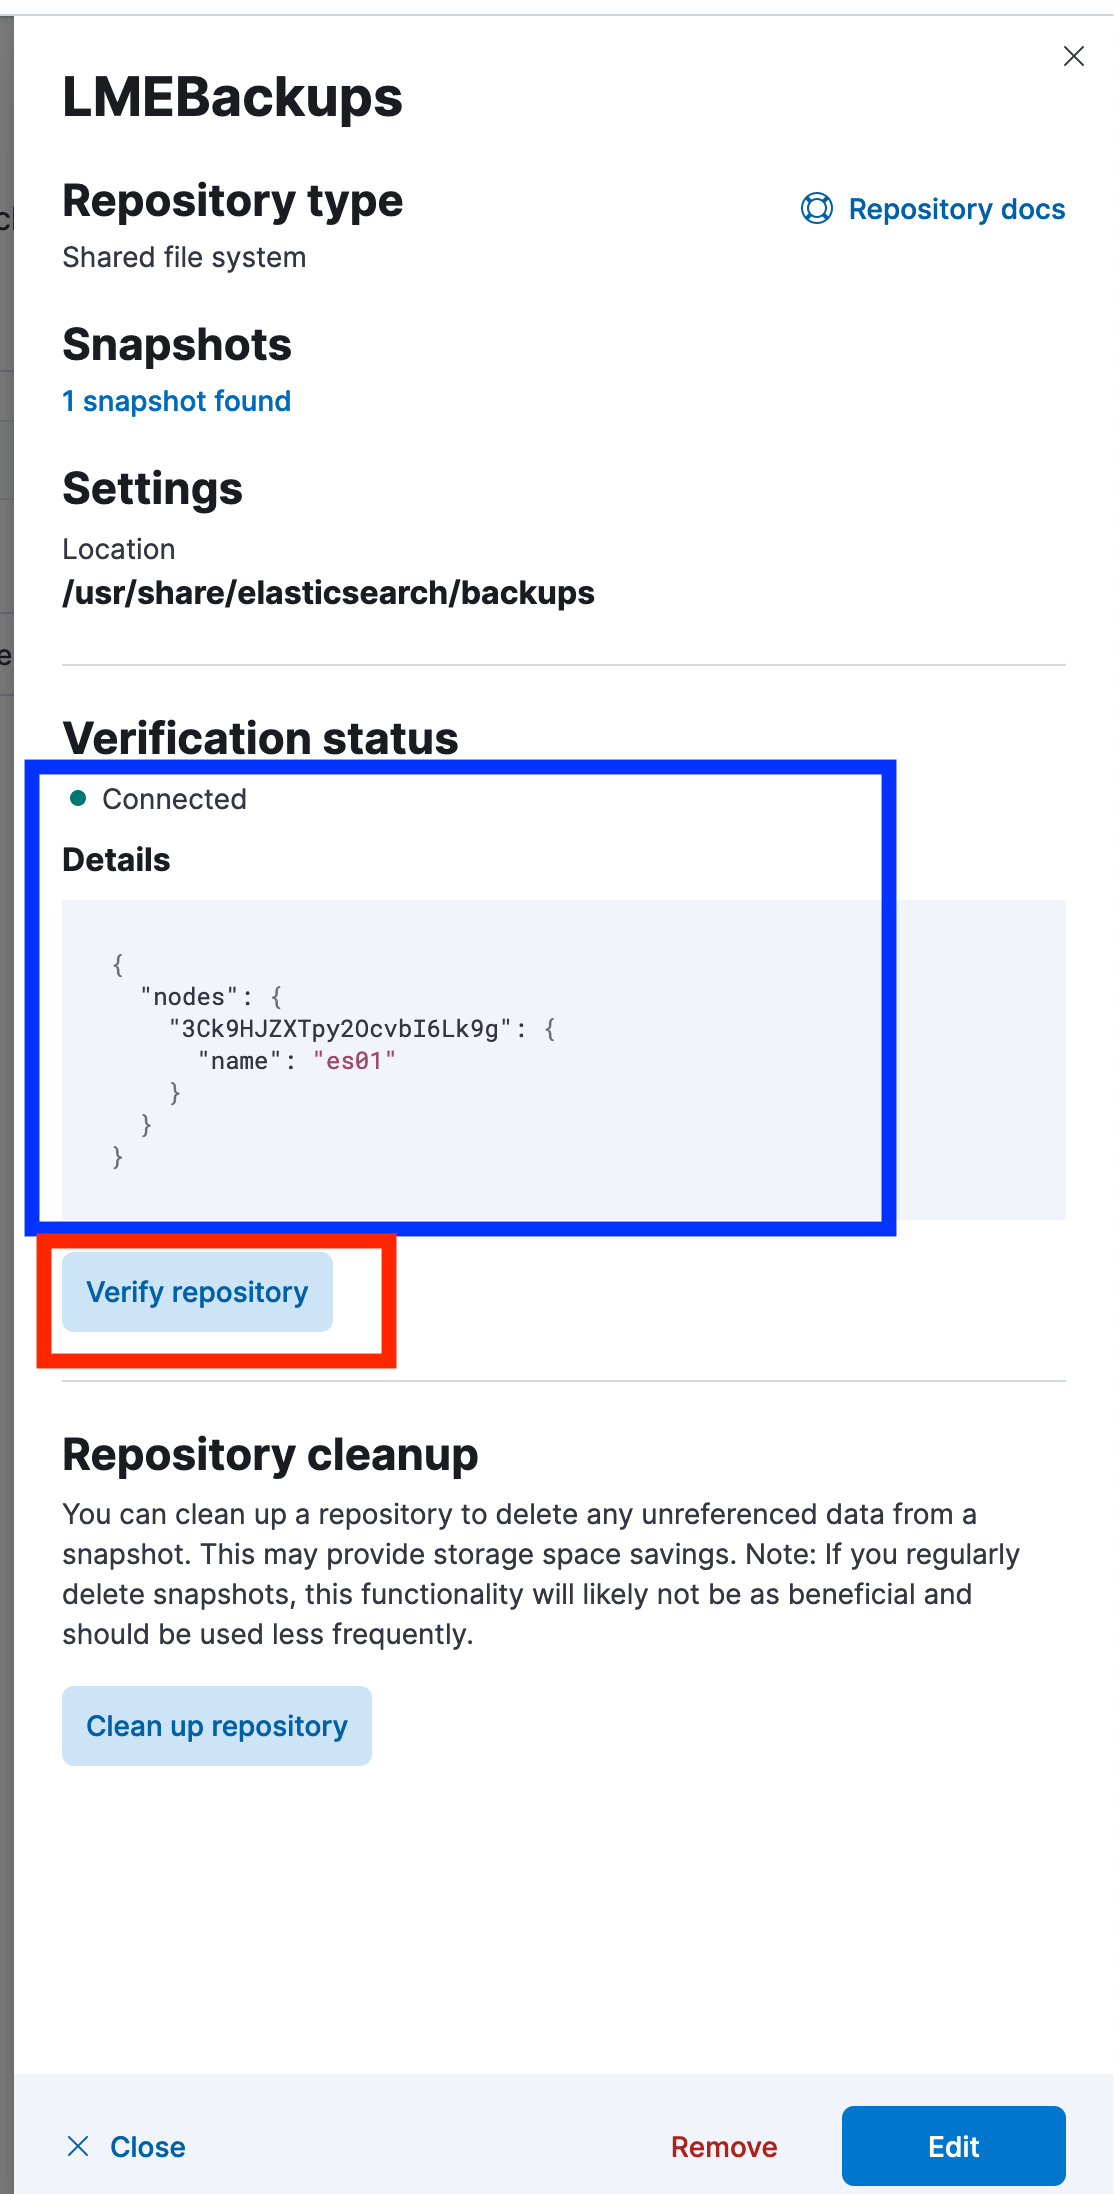
Step 3. Verify the Repository
After registering, click the Verify Repository button.
You should see a confirmation message that it’s connected successfully.
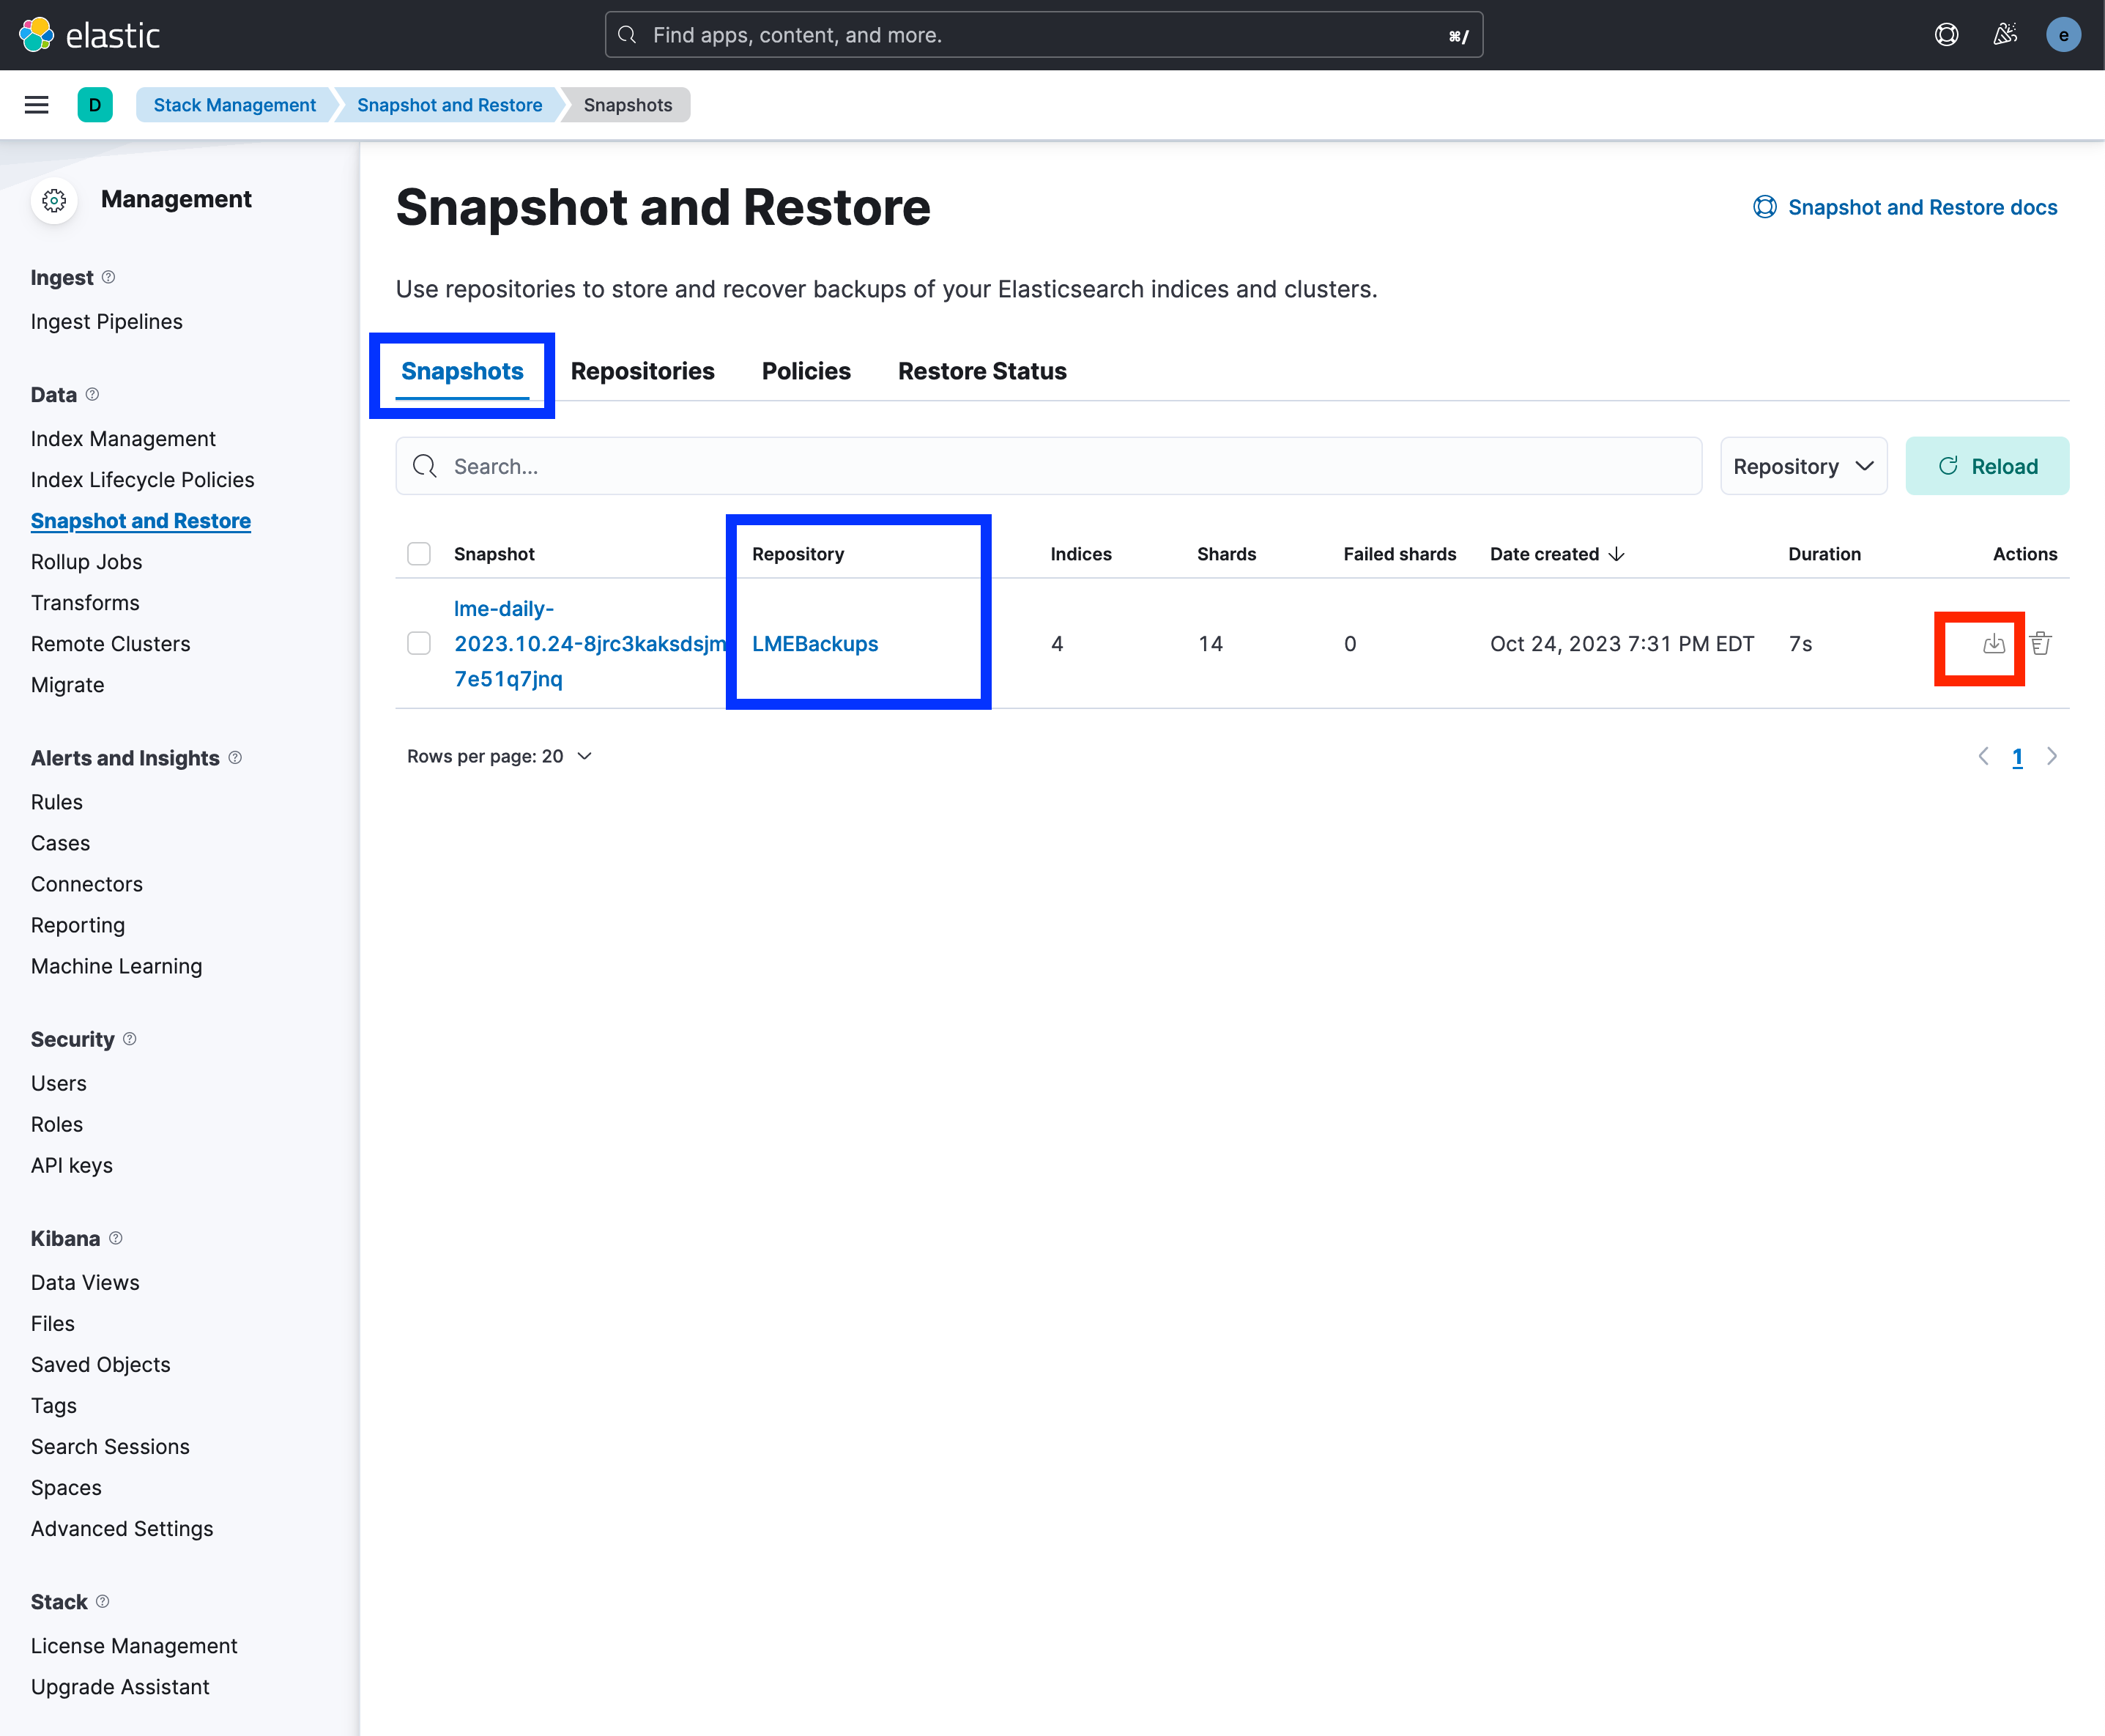
Step 4. Locate Your Snapshot
Navigate to the Snapshots tab.
You should now see your backup listed under the
LMEBackupsrepository.
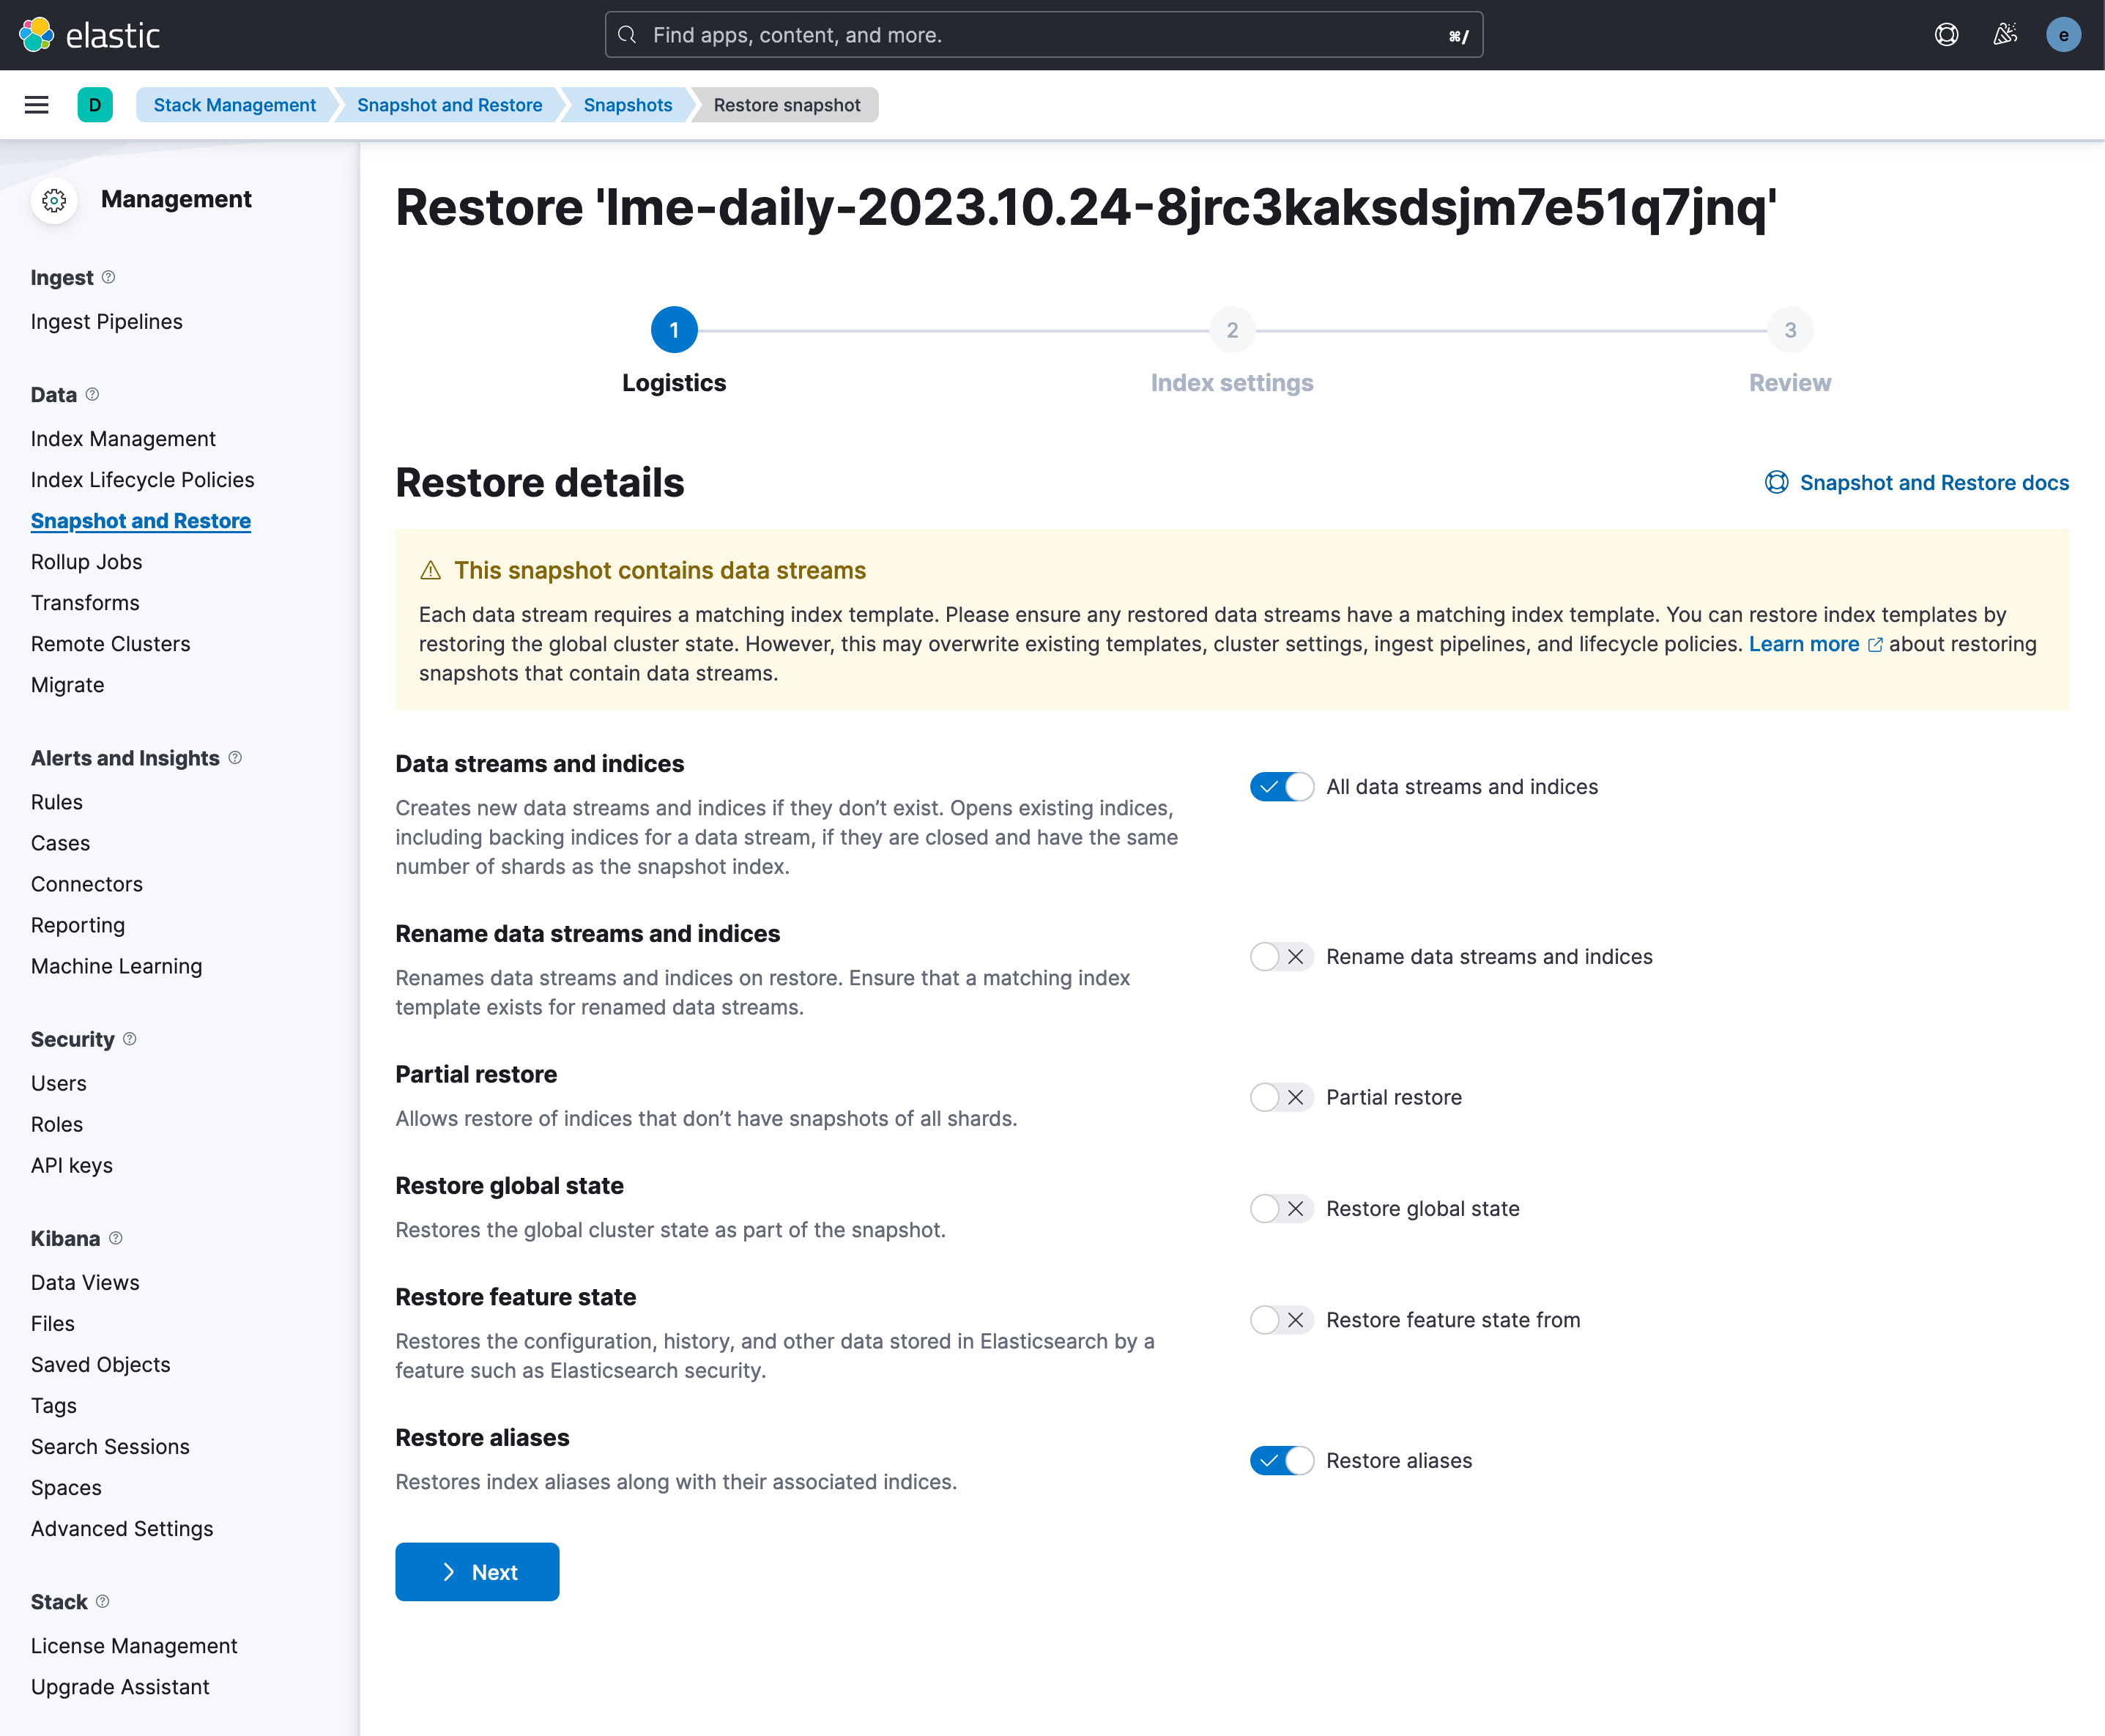
Step 5. Restore the Snapshot
Navigate to the Logistics tab -> Settings -> Review.
Use the default restore settings, or adjust them if needed.
Click on the Restore button to begin importing the data.
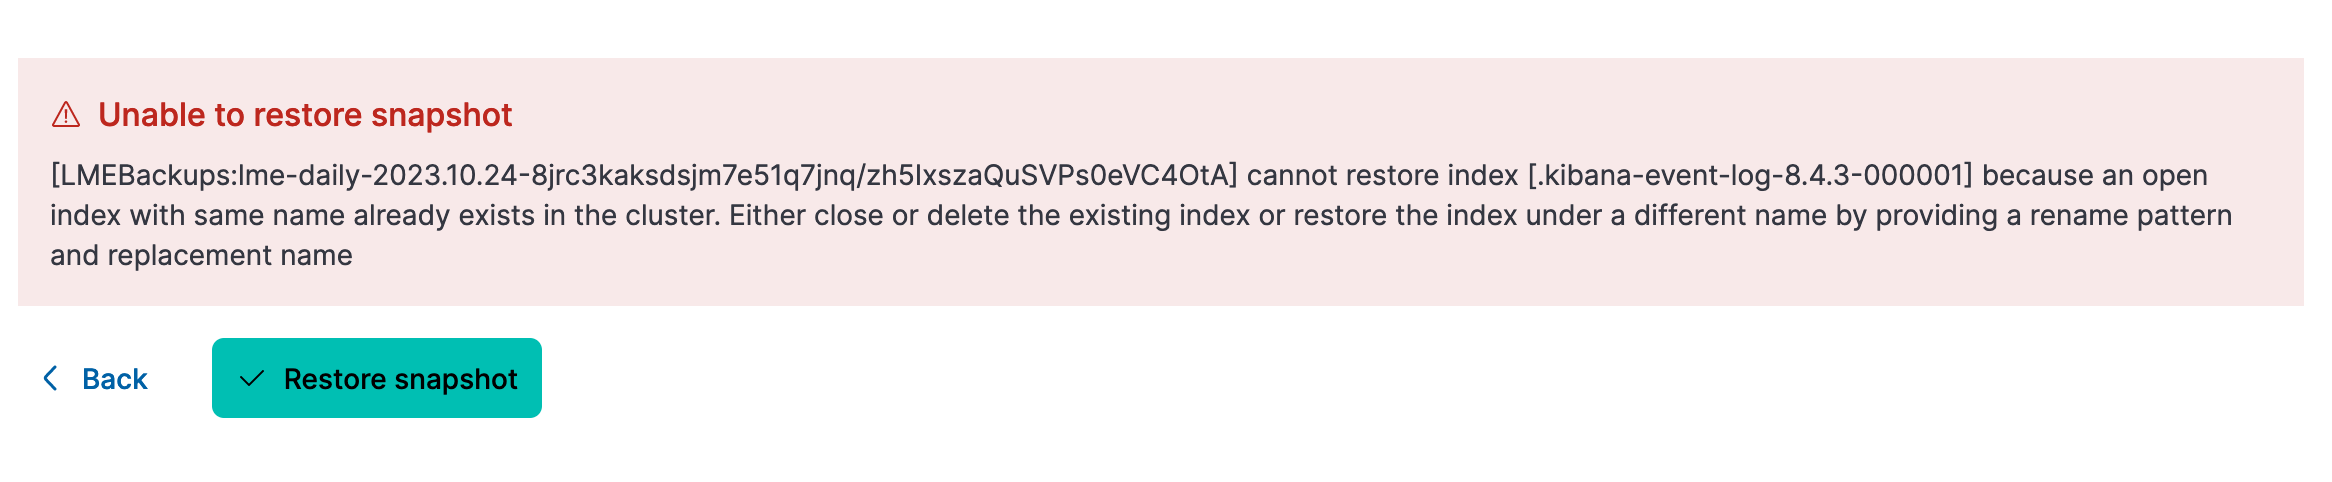
If You Encounter Index Conflicts
If Elasticsearch throws an error about index name conflicts (e.g., winlogbeat already exists), you have two options:
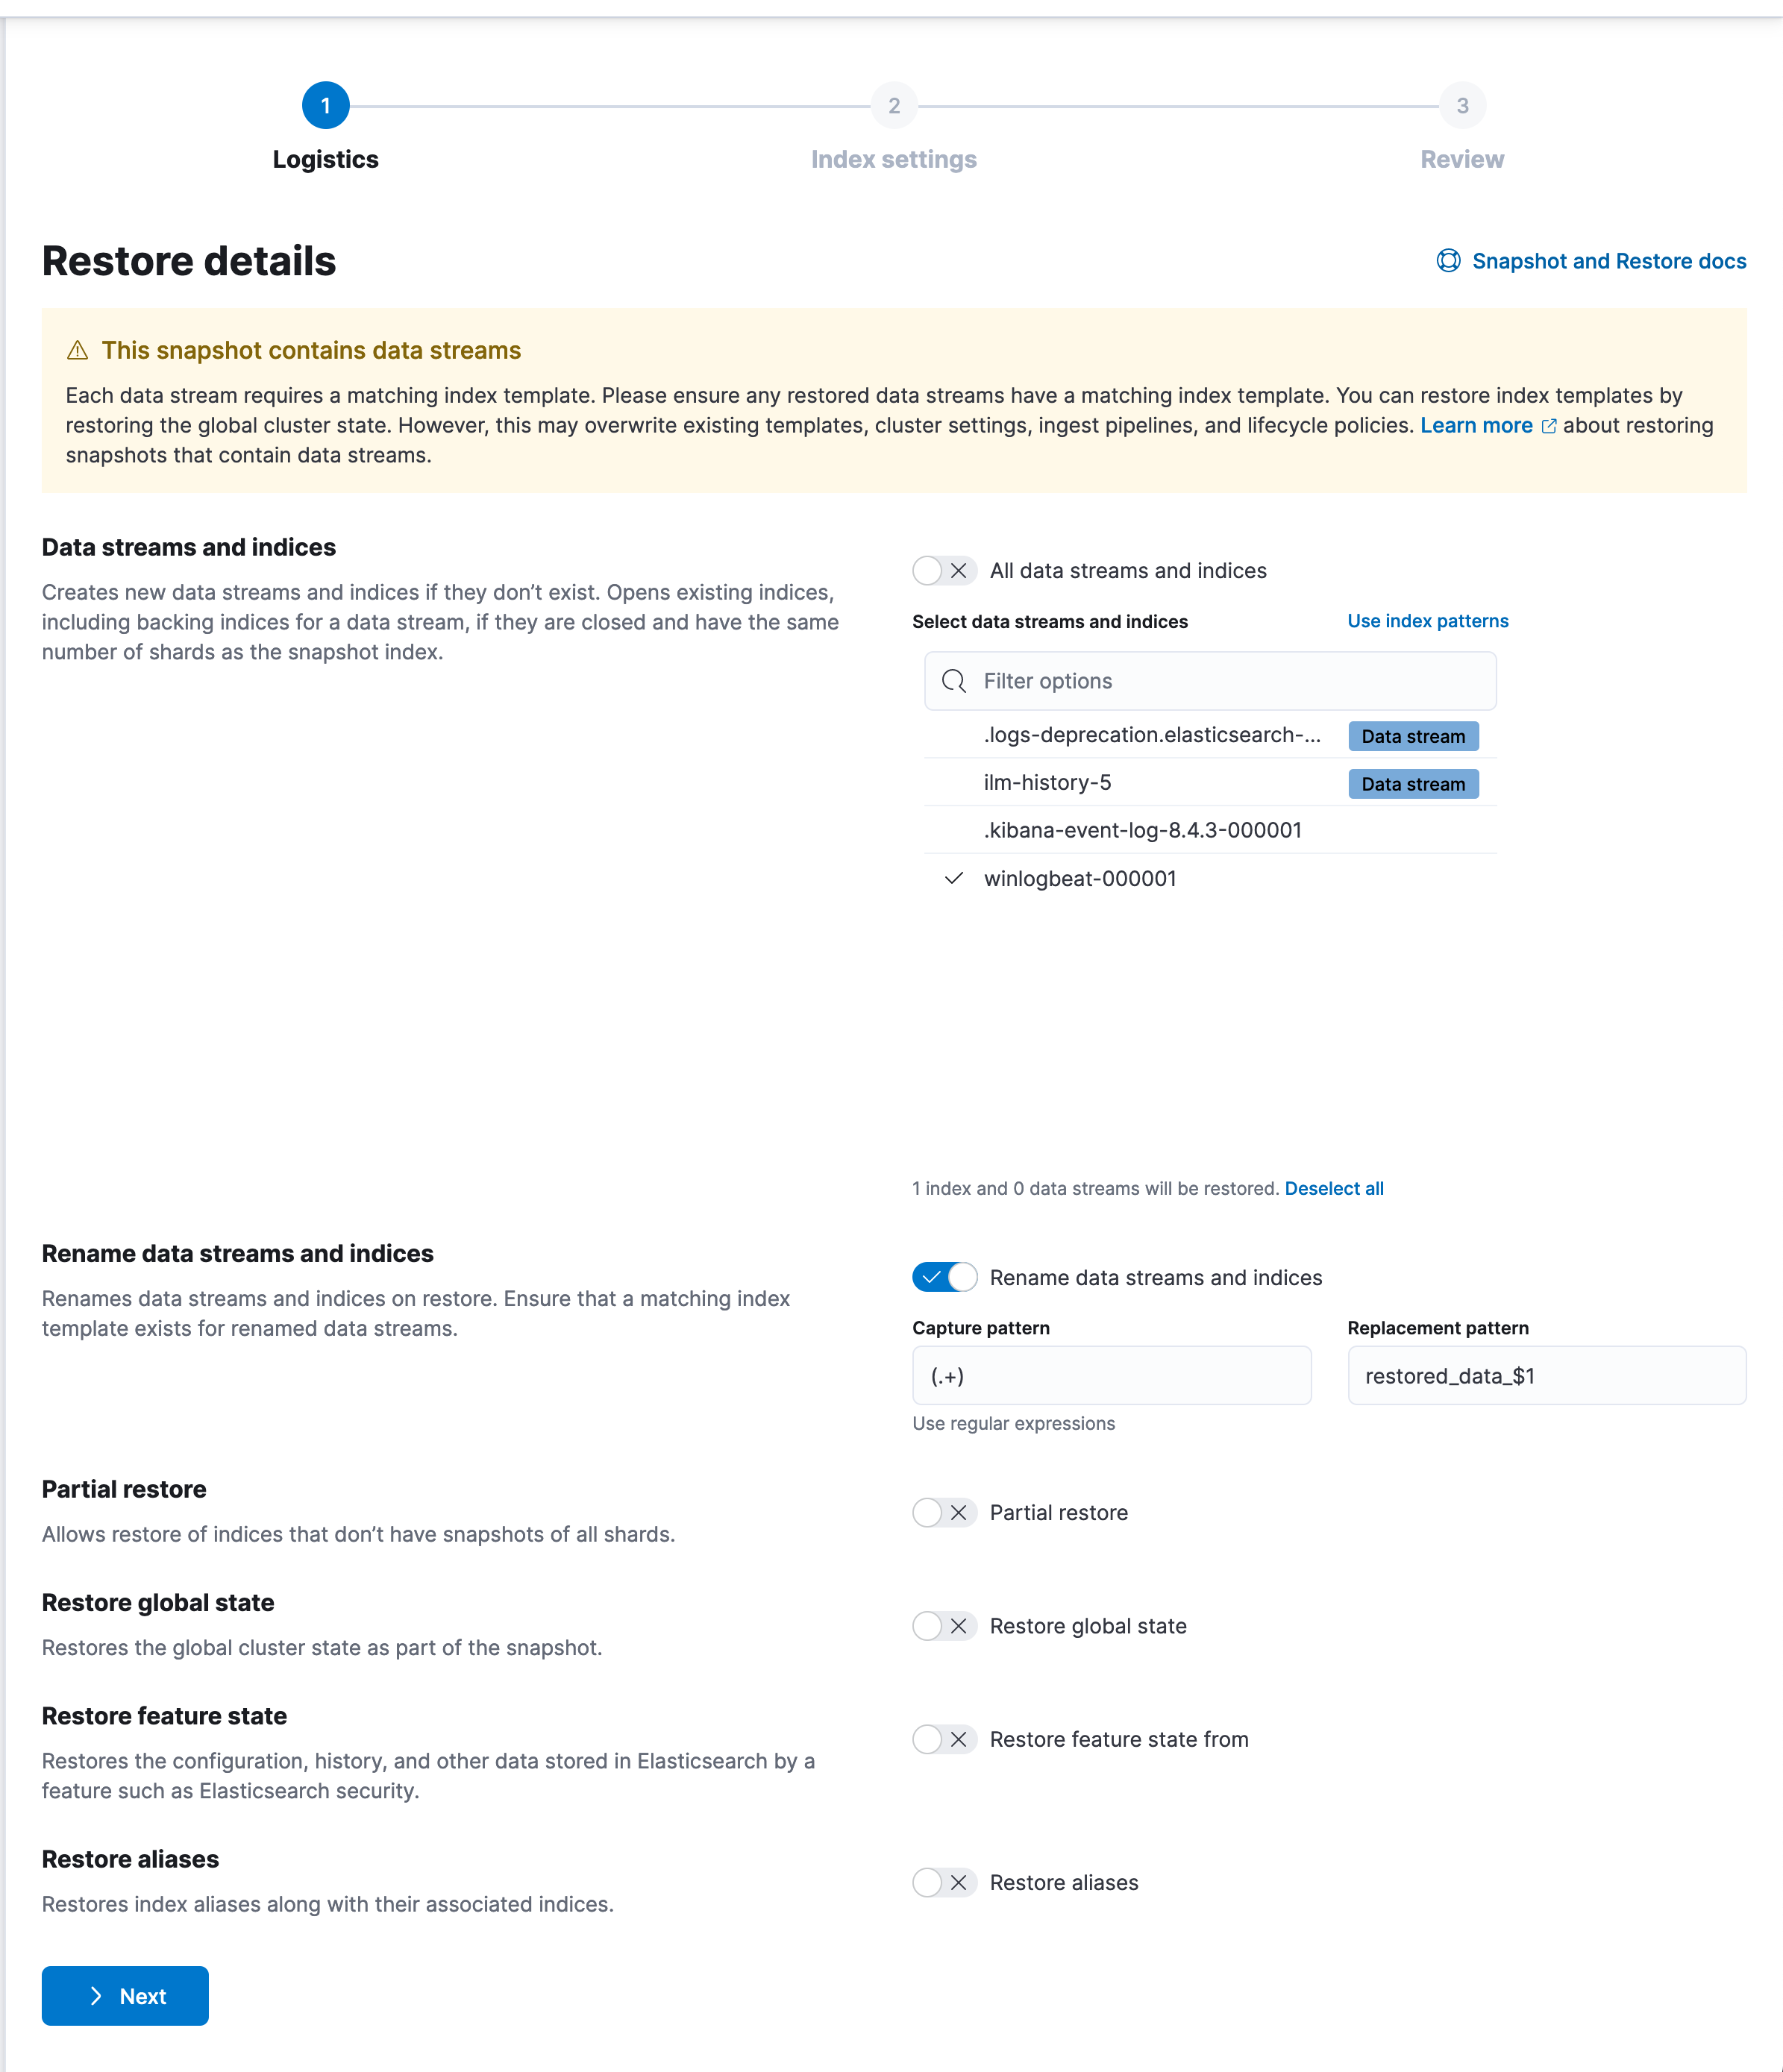
- Rename the Indices on Import
If you’re restoring
winlogbeat, rename the index during the restore process.Ensure to uncheck the restore aliases checkbox.
This avoids confusion between the old and new index names.
Proceed with the restore as usual using your new index name.
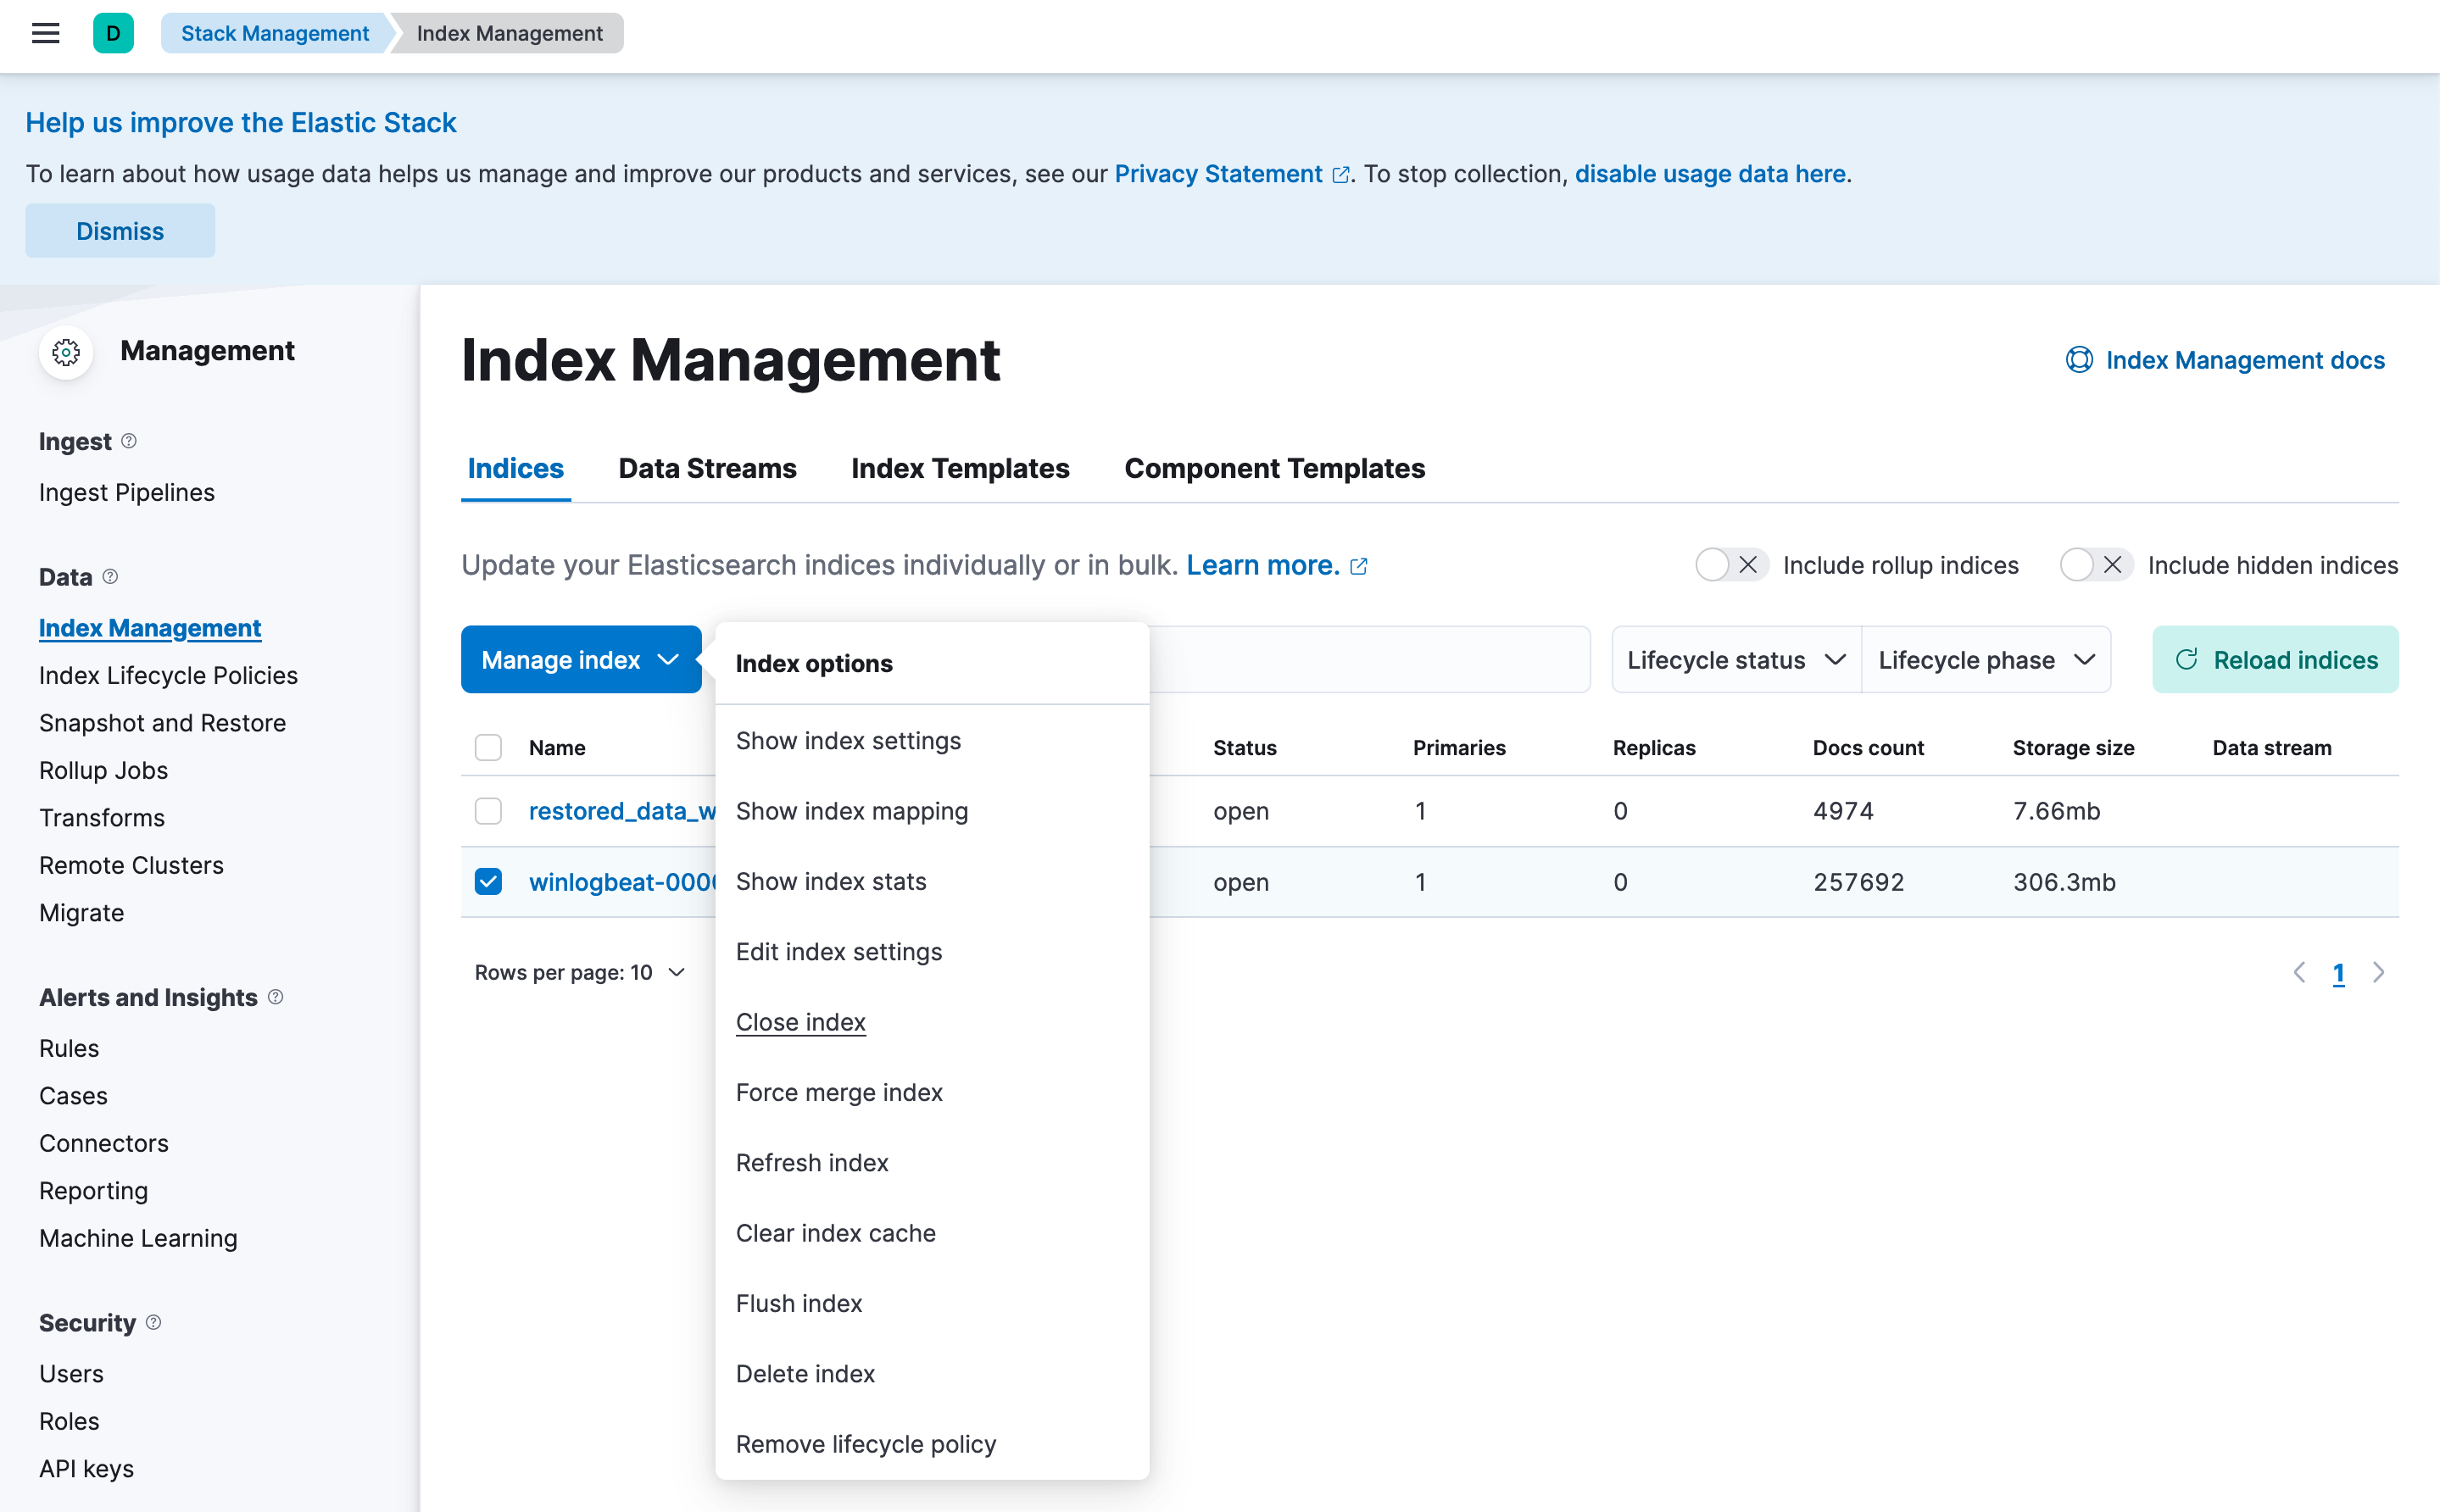
Close Current Indices to Enable Importing the Old
Navigate to Stack-Management -> Data -> Index Management on the navbar.
Locate and close any conflicting indices that already exist (e.g., `winlogbeat-*).