Elastic Agent Management - Enrollment Guide
This guide will walk you through the process of enrolling an Elastic Agent.
Steps to Enroll an Agent
Access the Fleet Menu
- Navigate to the LME dashboard:
https://{SERVER_IP}- Password information can be found in the Install documentation.
- The default user login is “elastic”.
- Click on the hamburger menu icon in the top left corner (three horizontal lines).
- Scroll down and click on Fleet.
- Navigate to the LME dashboard:
Add a New Agent
- Click on the Add agent button.
Select the Policy
- Click on the Create new agent policy drop-down menu.
- Select the appropriate policy (e.g., select Endpoint Policy if you’re adding an endpoint device).
Enrollment Settings
- Ensure the Enroll in Fleet (recommended) option is selected.
Select the Agent Type
- Click on the appropriate endpoint tab based on the desired endpoint:
- Linux Tar
- Mac
- Windows (ensure you run this in a PowerShell prompt with administrator privileges)
- You will be presented with an installation command for the selected platform.
- Click on the appropriate endpoint tab based on the desired endpoint:
Note: If you haven’t added the LME certificates to your trusted store, you’ll need to modify the command.
Modify the Command if Necessary (e.g., if certificates have not been added to the trusted store)
Type
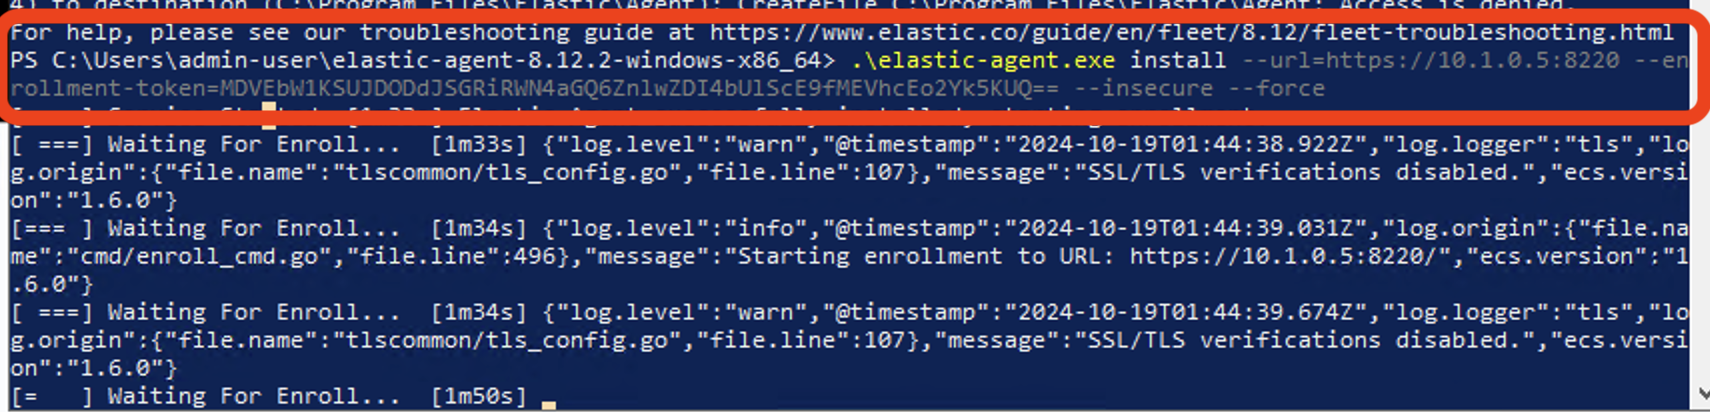
--insecureat the end of the ./elastic-agent install` command.This is similar to clicking Continue to Website in a browser when you get a certificate warning.
Example:
./elastic-agent install [-other-flags-youll-see] --insecureIt should look like this screenshot:
Copy the Command
- Once the command has been modified (if necessary), click on the command’s clipboard icon.
Execute the Command
Open a command prompt on the desired host.
Run the command on the desired host.
- It is recommended to run each line individually so you can see the status of each command. The entire process will download an agent, unzip it, and install it.
From Fleet, you should see the agent enrolled now.
LME Elastic Agent Integration
This guide will walk you through the process of adding a Windows integration to an agent policy in the Logging Made Easy (LME) system.
Steps to Add Windows Integration
Access Fleet and Agent Policies
- Navigate to the LME dashboard:
https://{SERVER_IP}- Password information can be found in the Install documentation.
- The default user login is “elastic”.
- Click on the hamburger menu icon in the top left corner (three horizontal lines).
- Scroll down and click on Fleet.
- Click on the Agent policies tab.
- Navigate to the LME dashboard:
Select the Target Policy
- Click on the policy to which you want to add the integration (e.g., click on Endpoint Policy).
Add Integration
- Click on the Add integration button.
Select Windows Integration
- From the list of available integrations, click on the Windows button.
- Click on the Add Windows button.
- Scroll down to review the options available; you’ll see various Windows logs and metrics that can be collected.
Customize Log Collection
- Review the options set to on or off; these options provide more choices for collecting Windows logs.
Important: If you have Sysmon installed on your endpoints, ensure Sysmon Operational is selected to collect Sysmon logs.
Configure Metrics Collection
- You can choose to collect various metrics from your Windows endpoints.
- Review and enable the metrics you’re interested in monitoring.
Save and Deploy
- After configuring your desired options, click on the Save and continue button.
- Click on the Add Elastic Agent to your hosts button.
Important Considerations
- Sysmon Integration: If you’re using Sysmon for enhanced logging, make sure to enable the Sysmon Operational log collection.
- Performance Impact: Be mindful that collecting more logs and metrics may impact endpoint performance; balance your monitoring needs with system resources.
- Regulatory Compliance: Consider any regulatory requirements you may have when selecting which logs and metrics to collect.
- Storage Considerations: More data collection means more storage usage; ensure your LME system has adequate storage capacity.
- Review Regularly: Periodically review your integration settings to ensure they still meet your needs and adjust as necessary.
By following these steps, you can effectively add and configure the Windows integration to your chosen agent policy in the LME system, allowing for comprehensive logging of your Windows endpoints.
Apply these same steps to future integrations such as Auditd for Linux.
Troubleshooting Agent Setup
The Elastic agent has multiple debugging commands that can be run to troubleshoot installs. Reference the Elastic Agent Command Reference for more information.
In addition, reference the Installation Layout to navigate/find the directories where Elastic agent is installed on the operating system.
If there are issues running the command involving a pipe file, it’s likely that the elastic endpoint service (Windows service started by the agent) is in a failed state. Restarting the maching machine will most likely resolve the issue. For more information, reference Access is Denied. However, this isn’t required if the agent is showing as healthy–you only need to run other CLI agent debugging commands.