ScubaConfigApp Module
The ScubaConfigApp is a PowerShell-driven UI built with Windows Presentation Framework. It’s not an executable—it’s lightweight, portable, and supports any Microsoft OS with graphical UI.
Overview
ScubaConfigApp module contains these elements:
- Configuration UI: WPF-based graphical interface for creating YAML configuration files
- Configuration Management: Functions for loading, validating, and exporting ScubaGear configurations
- ScubaGear Execution: Integrated ScubaGear assessment execution with real-time progress monitoring
- Native Report Viewer: Built-in WPF report viewer with colorful status badges and space-optimized layouts
- Localization Support: Multi-language UI text and validation messages. Currently only supported locale is: en-US
- Connected Support: Simplify selection screen to pull in Graph users and group IDs
- Debug Capabilities: Comprehensive debugging features
Main Function
Start-SCuBAConfigApp
Opens the ScubaGear Configuration UI for creating and managing configuration files, executing ScubaGear assessments, and viewing results with native report viewers.
Syntax
Start-SCuBAConfigApp [[-ConfigFilePath] <String>] [[-Language] <String>] [-Online] [[-M365Environment] <String>] [-Passthru]
Parameters
| Parameter | Type | Description | Default |
|---|---|---|---|
| ConfigFilePath | String | Path to existing YAML configuration file to import | None |
| Language | String | UI language (localization) | “en-US” |
| Online | Switch | Enable Microsoft Graph connectivity | False |
| M365Environment | String | Target M365 environment (commercial, gcc, gcchigh, dod) | “commercial” |
| Passthru | Switch | Return the configuration objects | False |
Examples:
# Basic usage - Launch the configuration UI
Start-SCuBAConfigApp
# Launch with Graph connectivity for commercial environment (Interactive)
Start-SCuBAConfigApp -Online
# Import existing configuration
Start-SCuBAConfigApp -ConfigFilePath "C:\configs\myconfig.yaml"
# Launch and connect to graph for GCC High environment
Start-SCuBAConfigApp -Online -M365Environment gcchigh
#Use Passthru with a variable to retrieve all configurations in hashtables
$SCuBAUI = Start-SCuBAConfigApp -Passthru
#retrieving data
$SCuBAUI.GeneralSettings | ConvertTo-Json
$SCuBAUI.AdvancedSettings | ConvertTo-Json
$SCuBAUI.GlobalSettings | ConvertTo-Json
$SCuBAUI.Exclusions | ConvertTo-Json -Depth 4
$SCuBAUI.Annotations | ConvertTo-Json -Depth 4
$SCuBAUI.Omissions | ConvertTo-Json -Depth 4
Features
Configuration Management
- Organization Settings: Tenant information, display names, descriptions
- Product Selection: Choose which M365 services to assess
- Exclusions: Configure policy exclusions for product-specific configurations outline in the Configuration File
- Annotations: Add contextual information to policies
- Omissions: Skip specific policies with rationale and expiration dates
- Advanced Settings: Output paths, authentication, and technical parameters
User Interface
- Tabbed Navigation: Organized sections for different configuration areas
- Real-time Validation: Input validation with immediate feedback
- Preview Generation: Live YAML preview before export
- Import/Export: Load existing configurations and save new ones
- Graph Integration: Browse users and groups via Microsoft Graph API
File Operations
- YAML Import: Load existing ScubaGear configuration files
- YAML Export: Save configurations in ScubaGear-compatible format
- Clipboard Support: Copy configurations for use elsewhere
ScubaGear Execution
- Run ScubaGear: Execute ScubaGear assessments directly from the UI
- Real-time Progress: Live monitoring of assessment execution with detailed progress updates
Report Summary
- Dynamic Report Tabs: Automatically generated tabs for each product assessed
- Space-Optimized Layout: Reduced vertical scrolling with compact report display
- Interactive Results: Clickable policy details and summary review
Usage Workflow
For a detailed step-by-step walkthrough — including how to save exclusions, look for the green/yellow save indicators, navigate between tabs, and generate your final YAML — see the Step-by-Step Walkthrough Guide.
The summary below covers the high-level flow:
Step 1. Launch the Application
Start-SCuBAConfigApp
- The WPF application window will open with tabbed navigation
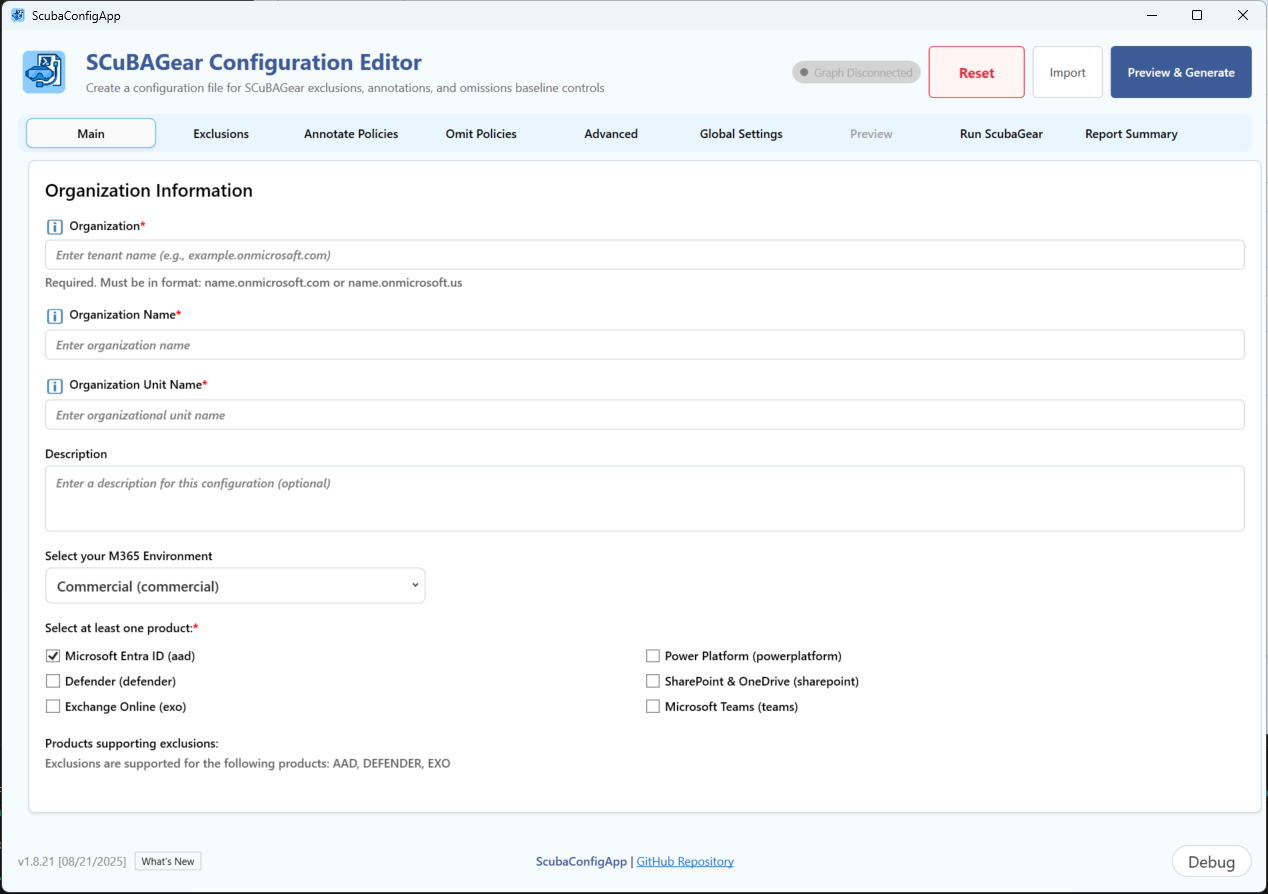
- Begin with the “Organization” tab which is selected by default
Step 2. Configure Organization Information
- Tenant Domain: Enter your organization’s primary domain (e.g., contoso.onmicrosoft.com)
- Display Name: Provide a descriptive name for your organization
- Description: Add optional details about this assessment configuration
- M365 Environment: Select your tenant environment (Commercial, GCC, GCC High, DoD)
Step 3. Select Products for Assessment
Navigate to the “Products” tab:
- Check the boxes for products you want to assess:
- AAD (Entra): Azure Active Directory/Entra ID policies
- Defender: Microsoft Defender for Office 365
- EXO (Exchange): Exchange Online configurations
- SharePoint: SharePoint Online settings
- Teams: Microsoft Teams policies
- Power BI: Power BI security settings
- Power Platform: Power Platform governance
Step 4. Configure Exclusions
In the “Exclusions” tab:
- Add specific users, groups, or policies to exclude from assessment
- Use the search functionality to find and select items
- Document rationale for each exclusion
Step 5. Add Annotations
In the “Annotations” tab:
- Add contextual notes or explanations for specific policies
- Provide additional information that will appear in reports
- Useful for documenting organization-specific configurations
Step 6. Add Omissions
In the “Omissions” tab:
- Skip specific policies that don’t apply to your organization
- Provide rationale and expiration dates for omitted policies
- Essential for compliance documentation
Step 7. Set Advanced Settings
In the “Advanced” tab:
- Output Path: Specify where ScubaGear results will be saved
- Authentication Method: Choose interactive login or certificate-based authentication
- Additional Parameters: Set optional technical parameters
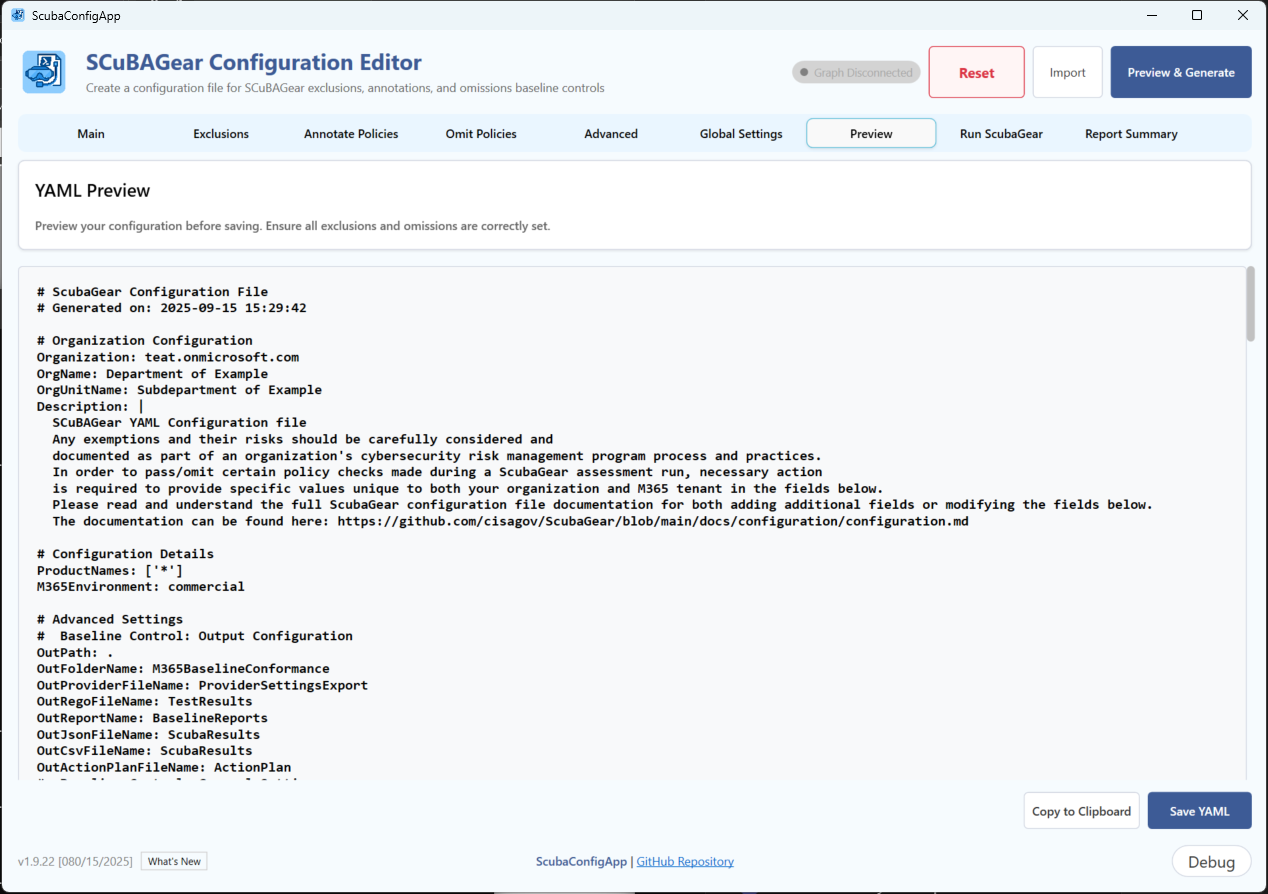
Step 8. Review Configuration Preview
Click “Preview & Generate” to enable the preview tab and generate the YAML file. This should automatically navigate to the “Preview” tab:
- Review the generated YAML configuration
- Verify all settings are correct
- Make adjustments by returning to previous tabs if needed
[!IMPORTANT] Be sure to click the “Preview & Generate” when done making updates to pull those changed into yaml output. Clicking on the Preview tab won’t show the update
Step 9. Save Configuration
Click “Save YAML”:
- Save the configuration file to your desired location
- The file will be named automatically based on your organization domain
- Configuration is now ready for ScubaGear execution
Step 10. Execute ScubaGear Assessment
- The “Results” tab will automatically activate
- Real-time progress monitoring will begin
- Watch the output window for execution details and status updates
- Assessment may take 5-15 minutes depending on tenant size and products selected
Step 11. Monitor Execution Progress
While ScubaGear runs:
- Progress updates appear in real-time in the output area
- Status messages indicate which products are being assessed
- Any errors or warnings are displayed immediately
- The interface remains responsive during execution
Step 12. Review Report Summary
Once execution completes:
- Report tabs automatically appear for each assessed product
- Navigate between product-specific reports using the tabs
Step 13. Analyze Results and Take Action
For each product report:
- Click on individual policies to view detailed findings
- Review recommendations for failed or warning policies
- Document remediation actions needed
- Export or save reports for compliance documentation
Run ScubaGear Feature
The integrated ScubaGear execution feature allows you to run assessments directly from the UI without manual command-line operations.
Execution Process
- Pre-Execution Validation: The UI validates your configuration before starting
- ScubaGear Invocation: Automatically calls
Invoke-SCuBAwith your settings - Progress Tracking: Real-time output display with status updates
- Completion Handling: Automatic report loading and tab generation
- Error Management: Clear error messages and troubleshooting guidance
Requirements for Execution
- Initialize-Scuba has been ran to ensure all modules and dependencies are installed
- Valid configuration with at least one product selected
- Appropriate Microsoft Graph permissions for your account
- Network connectivity to Microsoft 365 services
Output Monitoring
During execution, you’ll see:
- Product assessment progress (e.g., “Assessing Entra ID policies…”)
- Policy evaluation status
- Authentication confirmations (if running in interactive mode)
- Report generation progress
- Completion notifications or error messages
Report Summary Feature
The native WPF report viewer provides a modern, integrated experience for reviewing ScubaGear assessment results.
Status Badge System
Each policy displays a colored status badge indicating compliance level:
| Badge Color | Status | Meaning |
|---|---|---|
| Green | Pass | Policy meets compliance requirements |
| Yellow | Warning | Policy needs attention or has minor issues |
| Red | Failure | Policy fails compliance requirements |
| Blue | Manual | Policy requires manual review or verification |
| Gray | Error/N/A | Policy has errors or is not implemented |
Report Navigation
- Product Tabs: Click between different product assessments (AAD, Exchange, etc.)
- Policy Details: Click on individual policies for detailed findings
- Status Filtering: Visual scanning using color-coded badges
- Scroll Optimization: Compact layout minimizes scrolling requirements
Integration with ScubaGear
The configurations created by this UI are fully compatible with the main ScubaGear assessment tool:
# Use the generated configuration
Invoke-SCuBA -ConfigFilePath "path\to\generated\example.onmicrosoft.com.yaml"
Module Files
Core Files
- SCuBAConfig.psm1: Main module file containing all functions and UI logic
- SCuBAConfig.psd1: Module manifest with metadata and dependencies
- ScubaConfigApp.xaml: WPF UI definition file
Configuration Files
- ScubaConfigApp_Control_en-US.json: English localization and configuration settings
- Additional language files can be added following the same naming pattern
Requirements
- PowerShell 5.1 or later
- .NET Framework 4.5 or later
- Windows OS with WPF support
- ScubaGear Module (parent module)
Troubleshooting
Debug Configuration
Use debug window to get detailed information about:
- UI events and user interactions
- Configuration validation results
- Import/export operations
- Graph API calls and responses
Enabling Debug Mode
This is enabled by default. However if your not seeing the debug button, follow these steps:
- Edit
ScubaConfigApp\ScubaConfigApp_Control_en-US.jsonin the module directory. - Change
"DebugMode": trueto enable. - Restart the UI application. There will be a debug button in the bottom right corner.
Example:
{
  "DebugMode": true,
  ...
}
The Debug Window displays detailed diagnostic information, but it is not intended for end users to troubleshoot issues on their own. Instead, it is recommended to:
- Open an bug
- Export the log from the debug window (Santize it if needed)
- Explain the issue and attach the debug log to bug issue
[!IMPORTANT] A Sanitize option is available to replace sensitive data with placeholder values.

Common Issues
-
UI won’t launch: Check PowerShell execution policy. Use
-Passthruparameter to output error:# Basic usage - Launch the configuration UI $SCuBAUI = Start-SCuBAConfigApp -Passthru $SCuBAUI.error -
Graph connectivity fails: Verify the
Microsoft.Graph.Authenticationmodule is installed and your authentication credentials have Graph permissions. You must have the following Graph permissions:User.Read.All Group.Read.All Organization.Read.All Application.Read.All -
Configuration validation errors: Review required fields and format requirements. Be sure to click
Savefor each configuration and then the clickPreview & Generatebutton.
Issues / Troubleshooting / Workarounds
- Clicking between
New SessionandImportmultiple times may cause UI issues. Close UI and relaunch is the recommended - The UI does not support YAML anchors or aliases at this time. Use
-Onlineparameter to help build exclusions - The UI does not support JSON export at this time.
- The
-Onlineparameter does not support using a service principal at this time when running the UI; it must be interactive. A service principal can be configured within the UI (see Advanced Section) and will be used to ScubaGear within UI. - If no baselines are showing after selecting product names, it could be a communication issue with the GitHub repository. Change
PullOnlineBaselinestofalsewithin theScubaConfigApp_Control_en-US.jsonapp configuration file
Run ScubaGear and Report Summary Notes
- Report tabs: Report tabs are dynamically generated based on assessment results. If no results are found for a product, no tab will be created.
- Execution monitoring: ScubaGear execution runs in a background process. Closing the UI during execution will terminate the assessment.
- Report refresh: To view updated reports after making configuration changes, you must re-run the ScubaGear assessment.
- Native report viewer: The WPF report viewer replaces web browser controls and may display differently than the standard HTML reports generated by ScubaGear.
Development
Adding Localization
- Create new configuration file following naming pattern:
ScubaConfigApp_Control_<locale>.json - Translate all text elements in the localeContext section
- Create new baseline configuration file following naming pattern:
ScubaBaselines_<locale>.json - Translate text elements: name, rationale for each baseline item
- Set
PullOnlineBaselines:falsewithin theScubaConfigApp_Control_en-US.jsonapp configuration file - Update root module (
ScubaConfigApp.psm1) to support new locale.